Tutorial, Uncategorized
Fitting Fiona Lace Culottes
I would like to introduce you to one of my pattern testers ( and student in my fashion school ) Kurvy Kim. She is one of my curvy testers and I would like to share with you today the steps we took to fit and alter the Fiona Lace Culottes pattern to fit her body.
I always advocate a fitting “toile”/calico/muslin. It is essential when working with any pattern as this enables you to tweak and alter the pattern to your body size and shape.
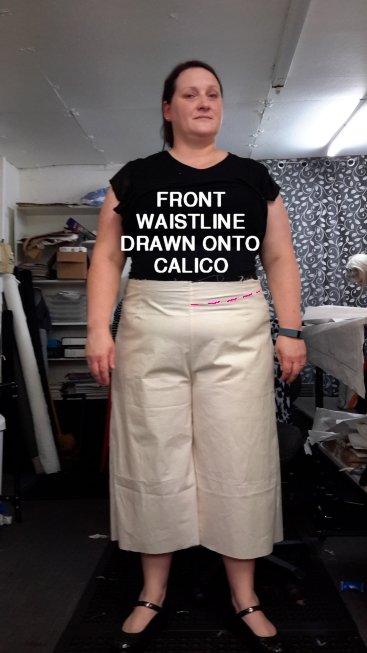
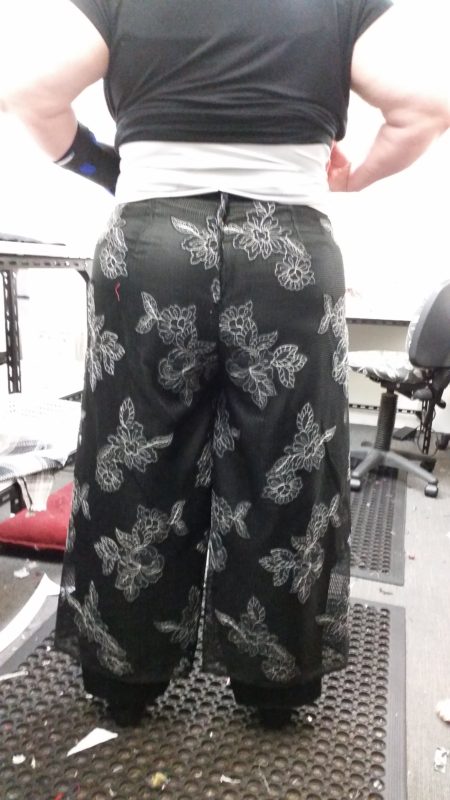
Step 1 – As seen in the above photo Kim is wearing her trial culotte that has been made in a medium weight calico. Due to Kim’s curvi-ness her front waist has to be dropped lower than the patterns front vertical crotch height.The photo shows where Kim’s desired front waistline has been drawn.
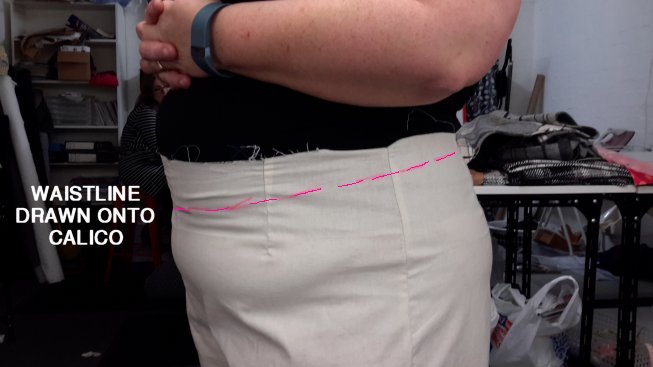
Step 2 – This is a side view of Kim’s waistline. The front waistline has been drawn much lower than the back waistline. Kim is fuller in the front of her body than the back. The newly drawn waistline also follows the indent in her body contouring into the fullness of her tummy.

Step 3 – Kim’s back waistline is drawn much higher as if it is worn to low on her body – when seated – the back crotch line will drag down. The angle of the waistline curves up from the side seam to nearly the same depth as the patterns back vertical crotch height.
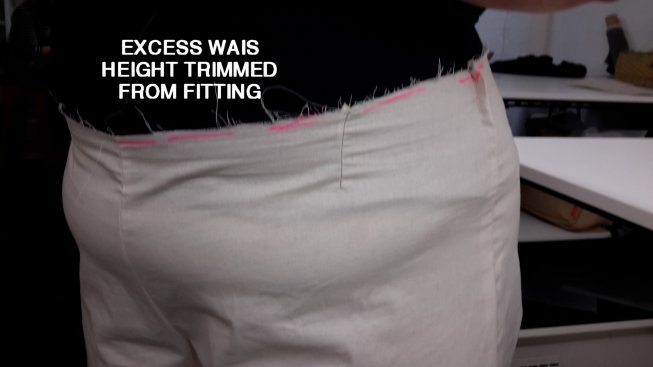
Step 4 – After ascertaining and then drawing the angel of Kim’s waistline the excess was trimmed from her fitting “toile”. Do not discard this trimmed piece as it will be used as a template for pattern alteration.
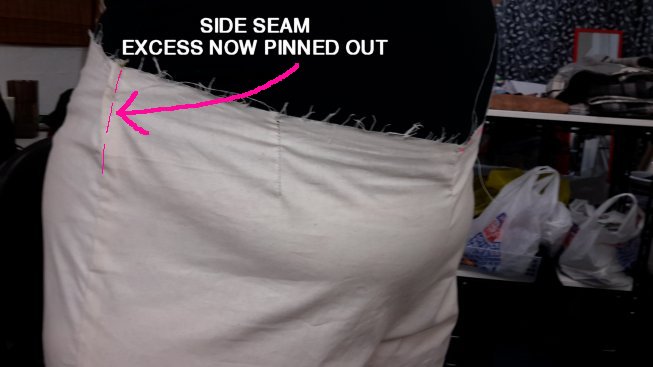
Step 5 – Now any shaping can be done to both the side seams and the darts if needed. The above photo shows that the side seams are pinned out to tighten the waistline.
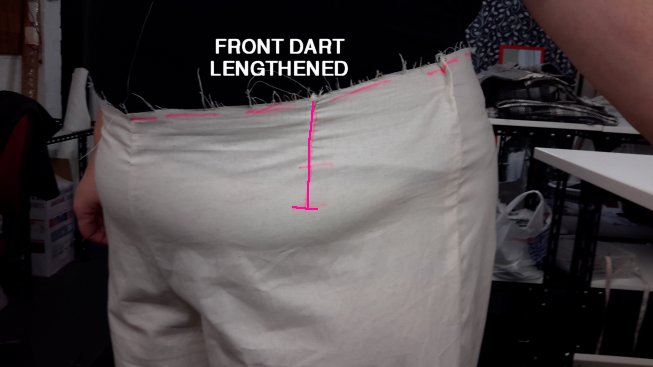
Step 6 – The front dart (after trimming the excess waistline height) will now be lengthened 3.5 cms to reach the curve of Kim’s front fuller tummy.
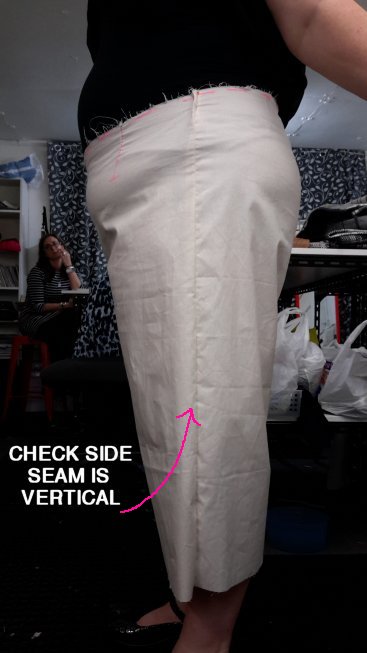
Step 7 – The side seam should now be checked to make sure that it sits straight and vertical.
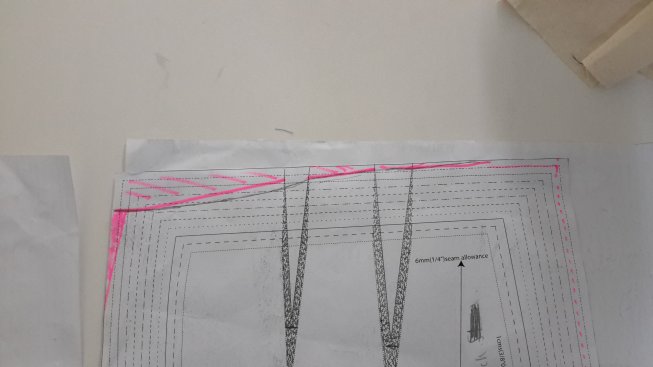
Step 8 – Using the trimmed excess that was cut from the fitting body after step 3 measure and mark onto your back pattern the excess that has to be trimmed from the back leg pattern. You have to factor in a waistline seam allowance so whatever is calculated to be trimmed off must allow for your desired seam allowance needed to finish this waistline with the facings. You will see in the above photo the side seam/waist point shaping, and the arc of the waistline back to the CB point. (the Fiona Lace Culottes allows for a 6mm waistline seam allowance)
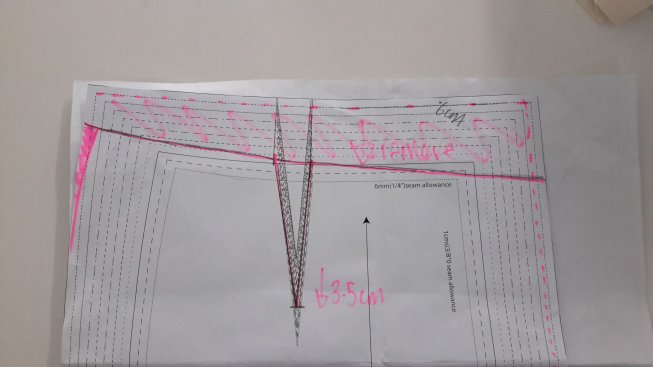
Step 9 – Again using the trimmed excess measure and mark onto your front pattern the excess that has to be trimmed from the front leg pattern. You will see in the above photo the side seam/waist point shaping, and the drop of the waistline down to the CF point. The dart is also lengthened 3.5 cms . Again you must factor in a waistline seam allowance so whatever is calculated to the trimmed off must allow for your desired seam allowance needed to finish this waistline with facings. (the Fiona Lace Culottes allows for a 6mm waistline seam allowance)

Step 10 – The pattern is then overlapped at the side seam so the lace can be cut in a continuous piece. ( please see tomorrows blog post ” Continuous Lace and the Fiona Culotte”) As the side seam has now been eliminated the zipper opening is now at CB.
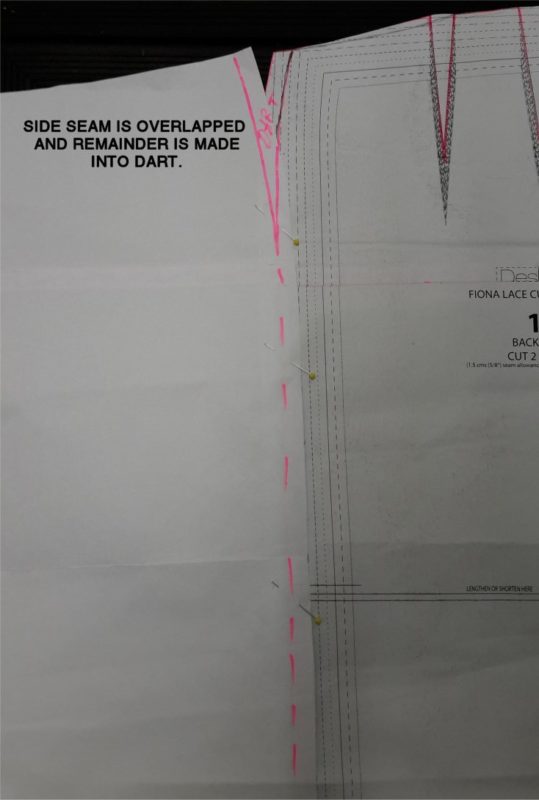
Step 11 – This photo shows that there is an excess of curved side seam left which is then converted into a side dart. ( please see tomorrows blog post
” Continuous Lace and the Fiona Culotte” ) The facings will also have to be re-drawn to conform to the new waistline shape. The darts are folded in the pattern and the facings are drawn onto the pattern itself. Then they are traced off as separate pattern pieces.
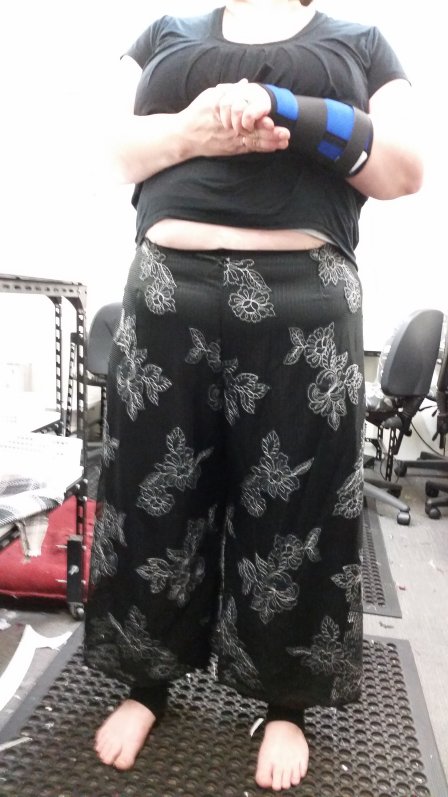
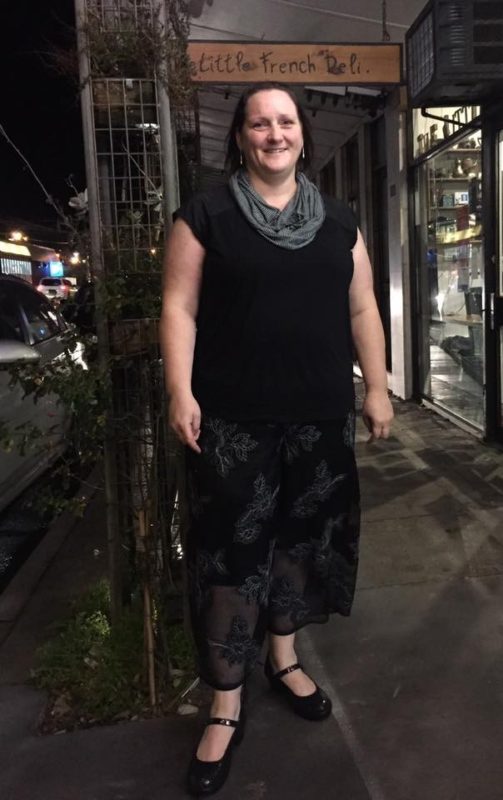
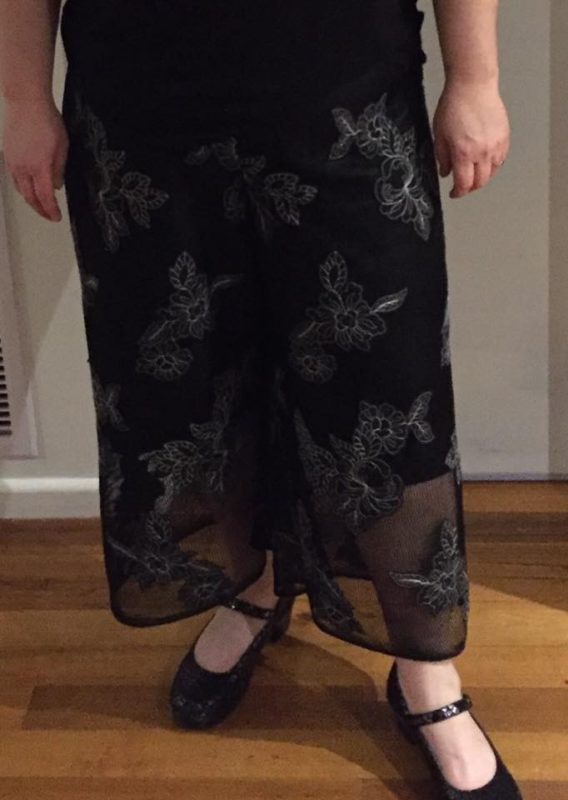
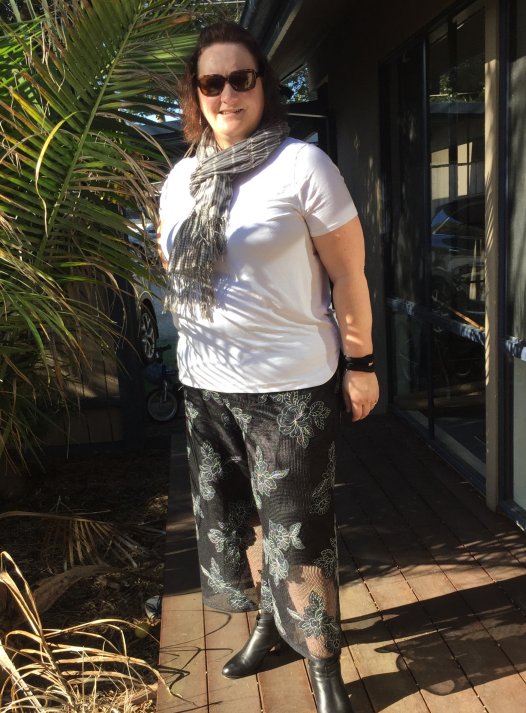
And here as some photos of Kurvy Kim wearing her Lace Culottes at final fitting stage. All darts and seams have been completed and lining has been inserted into the leg. The CB has been pinned to ascertain fit. Now Kim just has to sew in her zipper and apply the waist facings.

I hope that you have loved reading Kurvy Kim’s adventure in custom fitting the Fiona Culotte to her own personal shape and that you have learned a new skill to add to your own fitting repertoire.
Cheerio and all the best
Ann. xx
Thank you for posting this. I am curvy in the front too, but I never understood why pants were higher in the front on me, it seemed like my tummy should be making them lower. But I can see how to fix mine now! 🙂