Tutorial
How to Alter Crotch Length for Buttock Division
A Saturday greetings to you my lovelies and I hope you are well and happy today. I write this post as a further extension of my 2 very detailed posts on Fitting Pants that can be found here.
1. How to Lengthen Your Back Rise
2. How to Shorten Your Front Rise
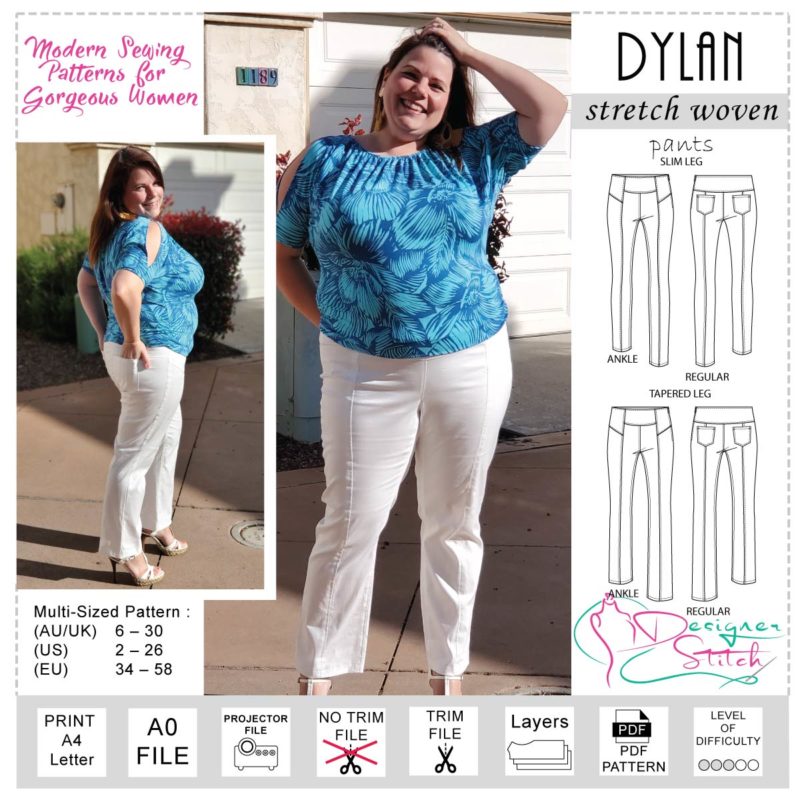
Today we released the fabulous stretch woven Dylan Pant and they are just amazing with their detailed styling – great fit, great shaping and offers the ability to really fine tune the fit of the pants to your body.
All of my amazing roadies have really done a superb job with their Dylan Pant and you can certainly see that there is a great myriad of body shapes and sizes.
 When we are in the testing process I guide all of my roadies through the process of fitting the pant to their bodies so –
A: they learn how to do it properly
B: then they are so proud of their finished product.
I want all of my roadies – and all of my customers – to have great pride when wearing a Designer Stitch sewing pattern. xx
Today I am going to detail the fitting and pattern alterations we needed for our roadie Jose VW and her Dylan Pants.
Here are a few pics of the back of her first Dylan Pant toile.
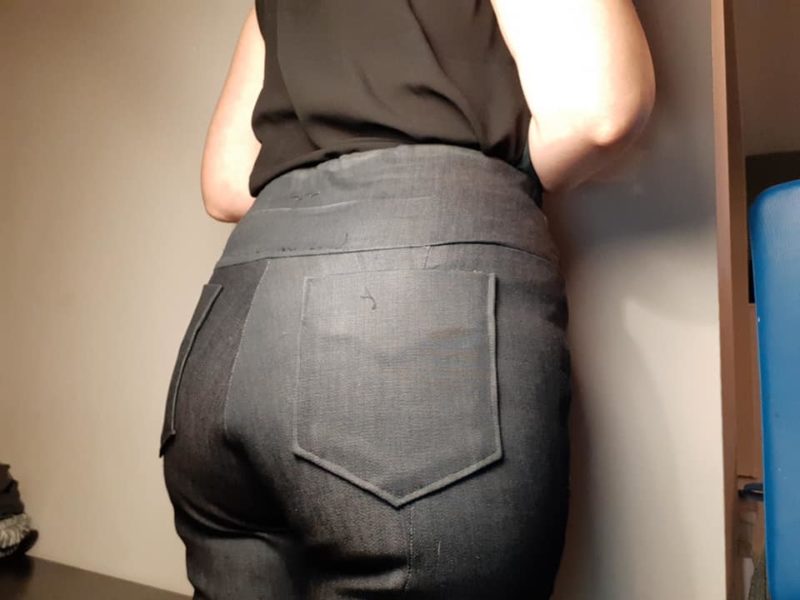
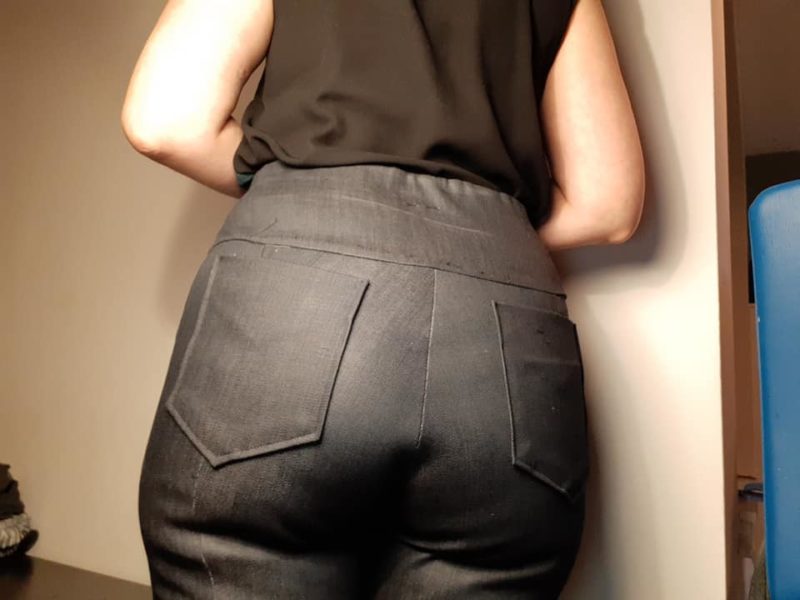
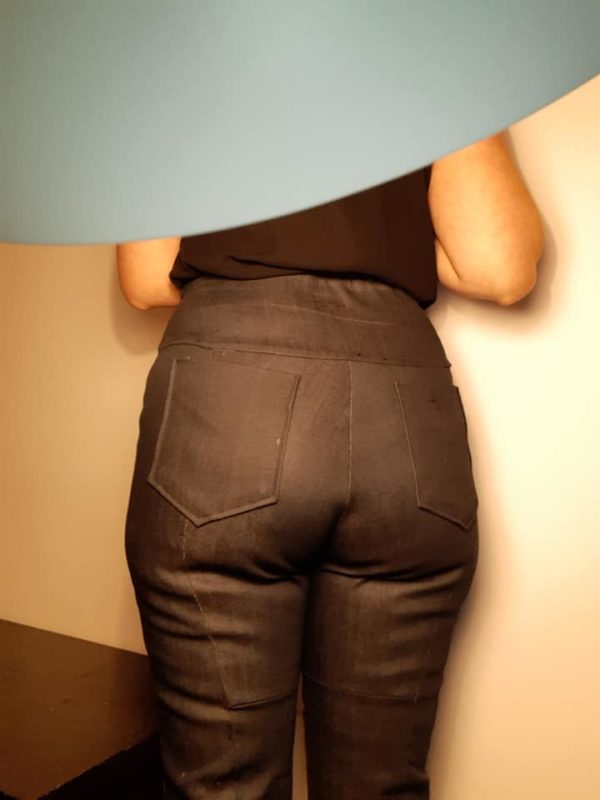
Our Jose has a long/tall pelvic frame and you can see that the back pant crotch curve is dividing her buttocks quite a bit. When this happens they make the garment look ill-fitting and non flattering.
So lets start on how I would tackle this.
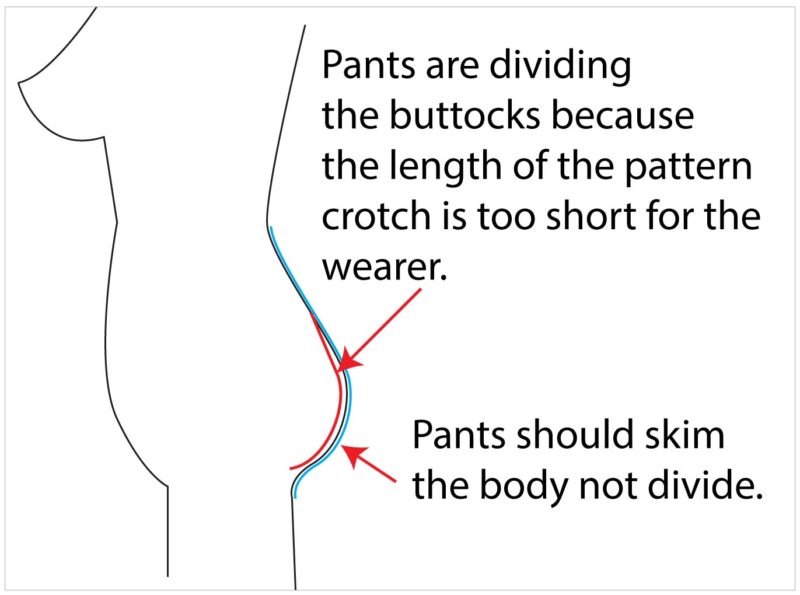
The above basic image is what is happening with Jose’s fitting toile of her Dylan Pant. The red line shows what the back crotch is doing on Jose’s body – and the blue line shows what is SHOULD be doing on Jose’s body. Pants should always skim the body – sit on the body – not divide the body.
THE IN-CORRECT WAY TO GAIN MORE CROTCH LENGTH/HEIGHT.
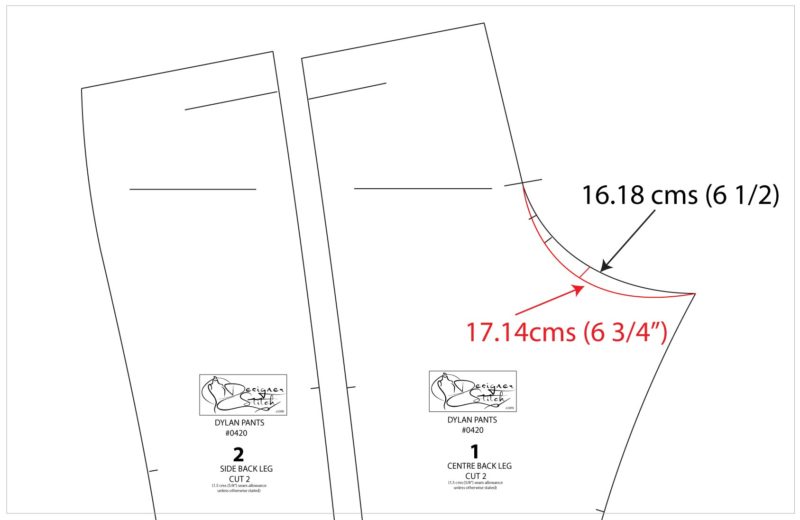
And here is an example of just drawing a deeper curved line to drop the back crotch in the hope it will give more length. The black is my original pattern and red line is a redrawn crotch line – here I have recurved it 1cm deeper.
When measuring each segmented line the red line (compared to the original black line) gives a gain of 8mm only…..Jose’s toile needs far more than that.
I see pant fitting instruction all the time on various blog posts and pants fitting guides detailing to just drop the crotch line (and it drives me BERSERK !!!!).
Just deepening the crotch line is impossible when needing 1.5cms plus.
If any curve was going to be reshaped and dropped the maximum should be 6mm – here I have dropped it 1cms and it is starting to skew out the crotch curve.
You can see we have only gained 8mm (just under 3/8″) which is far from enough. Jose needed a minimum of 2.5cms (1″) plus.
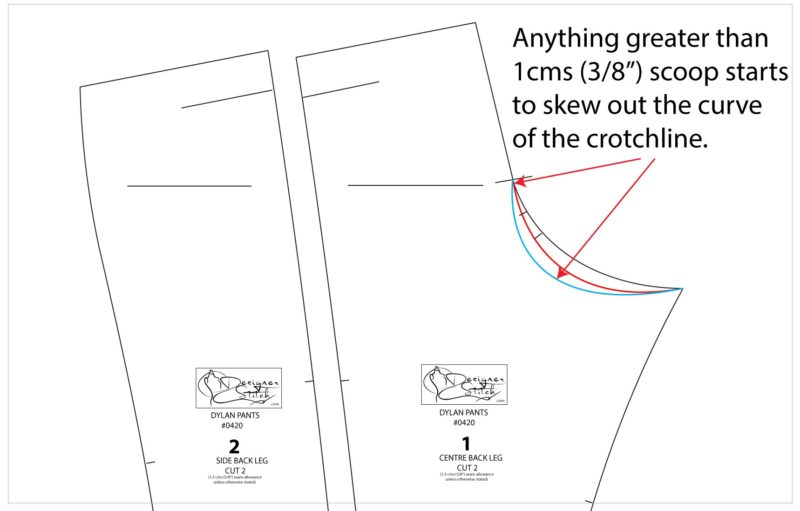
Above image is an example of dropping/scooping the crotch curve more than the red line – which was a gain of only 8mm.
The more the curve is dropped the greater the skew of the crotch curve itself – which not only doesn’t give enough length needed – but you also start to compromise the actual width of the trouser leg across the horizon.
THE CORRECT WAY TO GAIN MORE CROTCH LENGTH/HEIGHT.
To get length or height into the pattern – and I am using the new Dylan Pant pattern here as an example – the pattern needs to be split and length added vertically into the pattern.
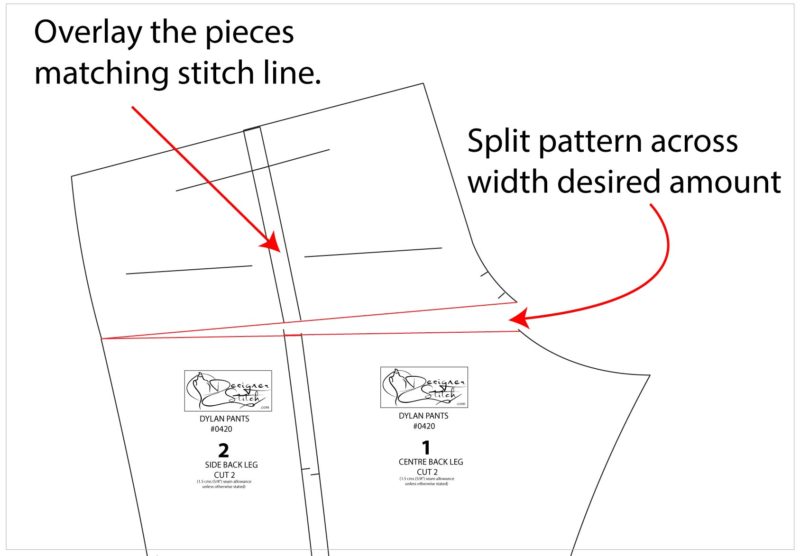
Here the Dylan Pants pattern has to be overlapped (the back pattern itself is divided into 2 for shaping and style detailing) – and then the pattern is cut horizontally across the width of the leg.
The pattern is then pivoted and opened up the desired amount – back to nothing at the side seam.
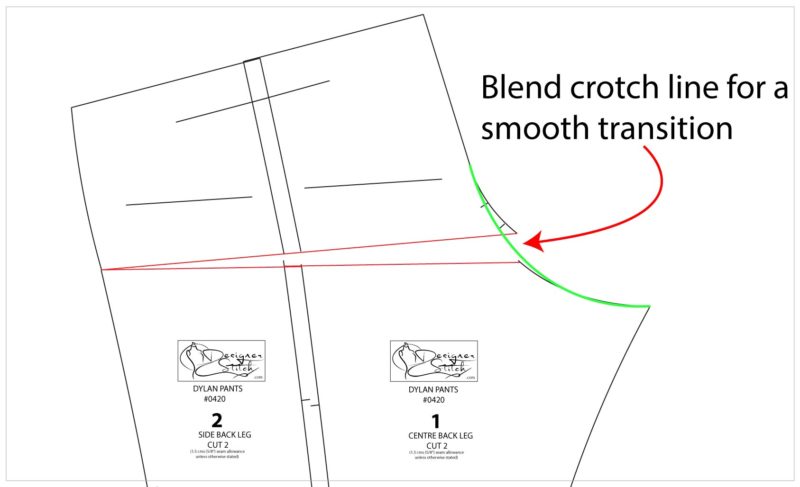
Spare paper is then glued to the split opening on both pieces to fill in the gap made on both pattern pieces.
Then the crotch curve is blended back on itself to create a smooth cutting and stitching transition.
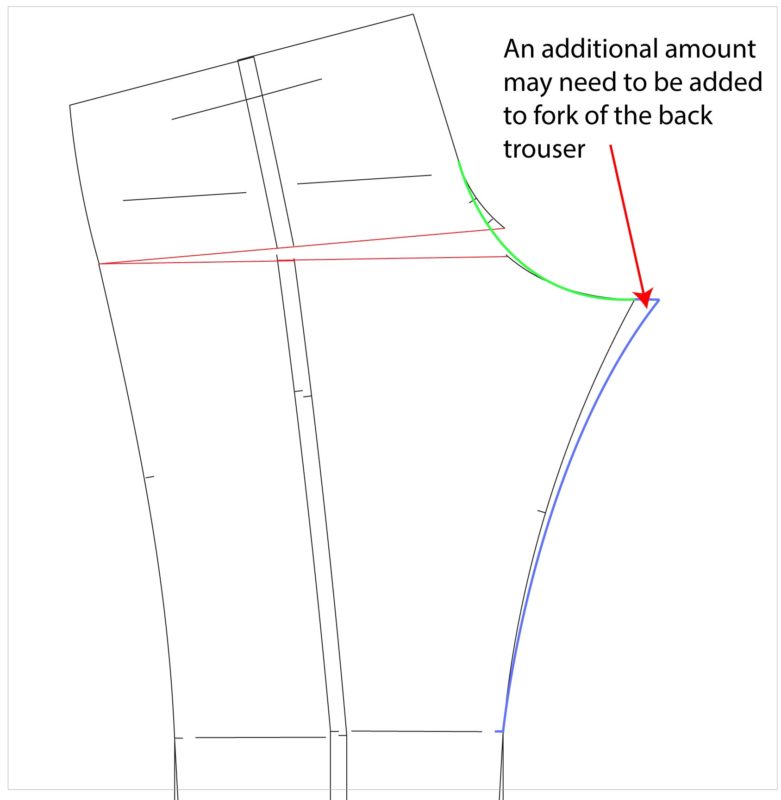
An additional amount may be need to be added to the back fork – but the crotch must be altered first and then you will probably have enough inner leg seam allowance to offset the back seam on your toile before your final decision is made – then the pattern can be altered easily.
I hope that you have learnt something new to add to your sewing repertoire and dont forget to visit my other pants fitting blog posts which covers other in depth pants fitting processes.
1. How to Lengthen Your Back Rise
2. How to Shorten Your Front Rise
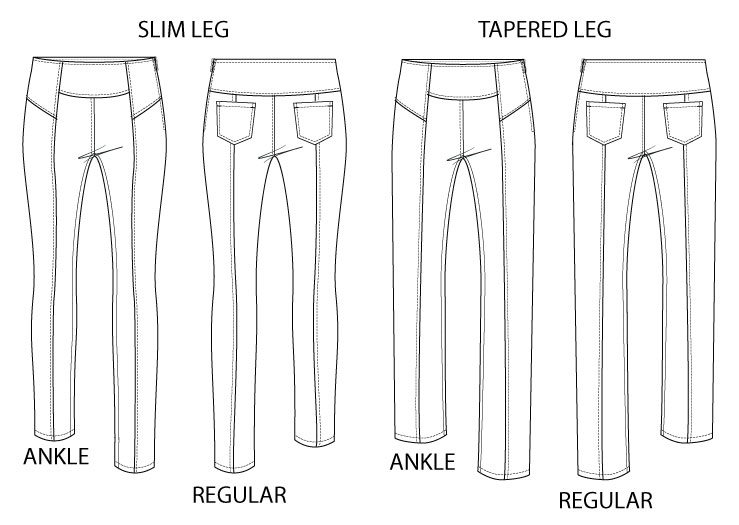
And the finer details of the Dylan:
On Sale for a limited time only – $8.95 (US)
https://designerstitch.com/shop/dylan-pants
multi-sized pattern :
(AU/UK) 6 – 30
(US) 2 – 26
(EU) 34 – 58
The Dylan Slim or Tapered pants are a jeans silhouette that you will love. Slim fit through the body they are easily pulled onto the body and have all day stretch for ultimate comfort.
Very Confident Advanced Beginner/Intermediate Sewing Level.
Cheerio and love to you all xx
Ann at Designer Stitch xx
This makes so much sense! I never understood why I had to scoop out the crotch, that gives me less fabric when I obviously need more. And some places I read to put the extra fabric back on the hips, okay, that’s fine, but now the side seams don’t match.
It also explains why a certain other pants pattern fit so well. I was skeptical because the crotch curve was a very narrow U shape, but the pants were high waist and with a dropped crotch so there was plenty of room and they fit great as designed.