pattern tester roundup
Estelle Pants Pattern Testers Roundup Part 2
Hey ho my friends. Thank you for joining us in the Estelle Pants Pattern Tester Roundups Part 2.
Yesterday’s post – Part 1 – gives great insight into the skills of our pattern testers. As does todays Part 2.
As I shared yesterday the roadies specific brief for this road test was all about fit – making sure that body measures were compared to that of the pattern and then adjust accordingly.
The sewing instructions themselves offer great fitting advice in the form of 2 fit lessons.
One on fitting crotch depth and the other on adjusting for a fuller tummy.
Sewing pants are not difficult – it is all about making sure the fit is the most flattering on your body.
With careful measuring and adjustments this can easily be achieved.
So, lets continue this fabulous Estelle Pants cavalcade with part 2 of the Estelle Pants Pattern Testers Roundups.
My roadies would like to share with you
1. Their name and where you live?
2. What fabric combinations did they choose and where did you purchase.
3. What sewing tips can they share when sewing the Estelle Pants?
4. What was your style choice for the Estelle Pants?
5. What fit alterations did you have to make to the Estelle Pants?
6. Have you worn your Estelle Pants yet and what compliments did you receive.
7. Any plans for future combinations of the Estelle Pants?
And the finer details; (AU/UK) 6 – 30 (US) 2 – 26 (EU) 34 – 58
On Sale for a limited time only – $9.25
Very Confident Advanced Beginner and Above Sewing level.
Estelle Pants
Hello Lovelies,
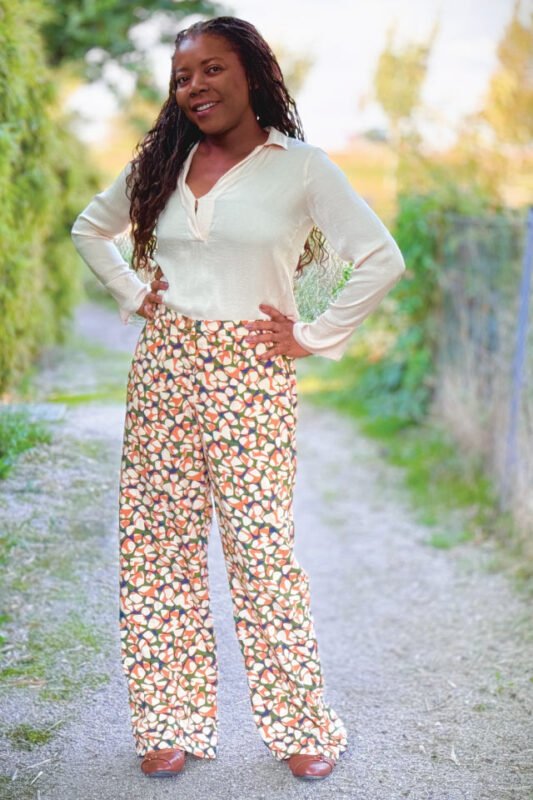
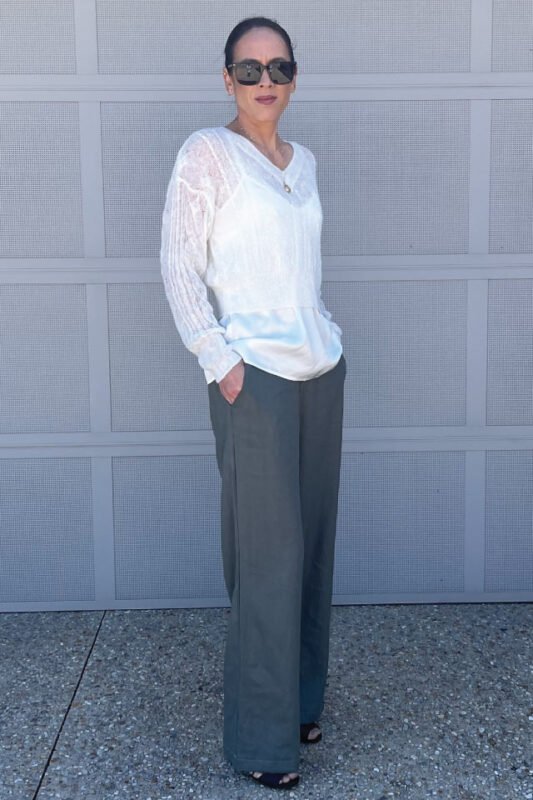
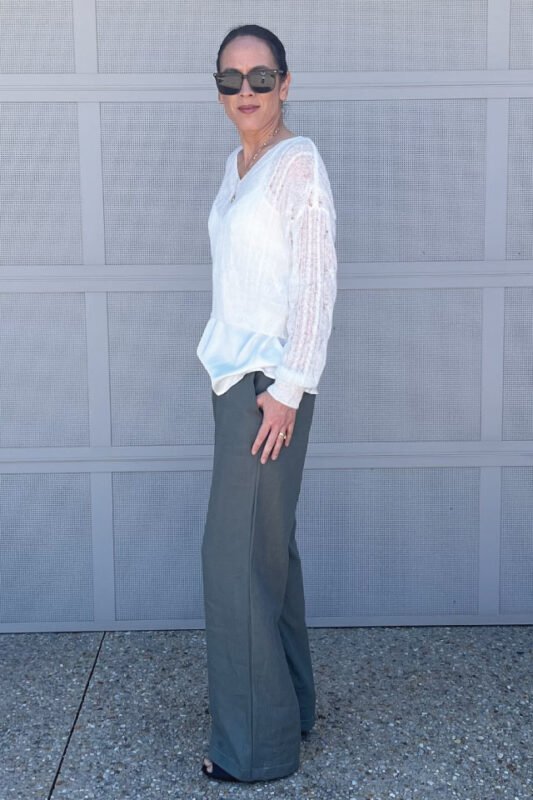
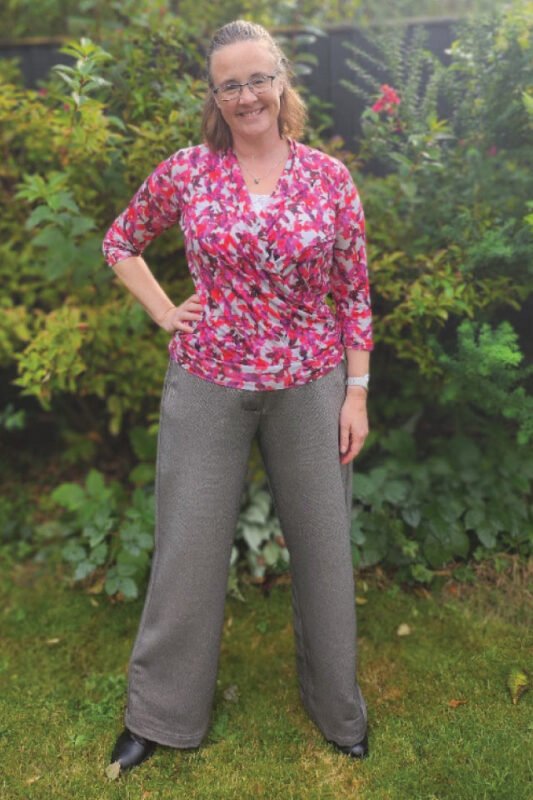
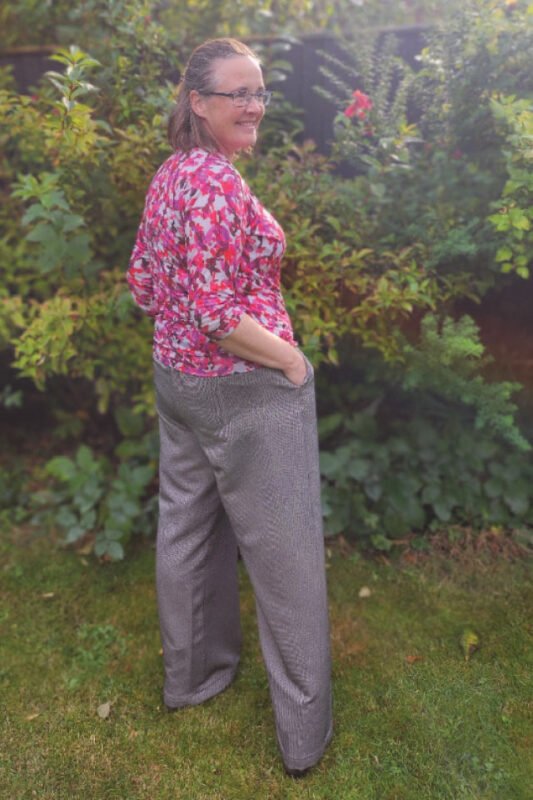
I’m Brenda from the Netherlands and I made the longest version for the Estelle pants. In my version I did 1 of the back pockets liking the asymmetric look of that.
I used a linnen fabric that I had in my stock, I think it came from driessenstoffen.nl.
I’ve had no chance to wear the pants yet, because the day after I took pictures the weather went bad, and it has been raining and chilly over here. I’m sure though that I will get tons of wear from the pants in the spring, I just have to wait a little longer.
You can find more of my sewing over at: https://www.instagram.com/fabricfairybrenda/
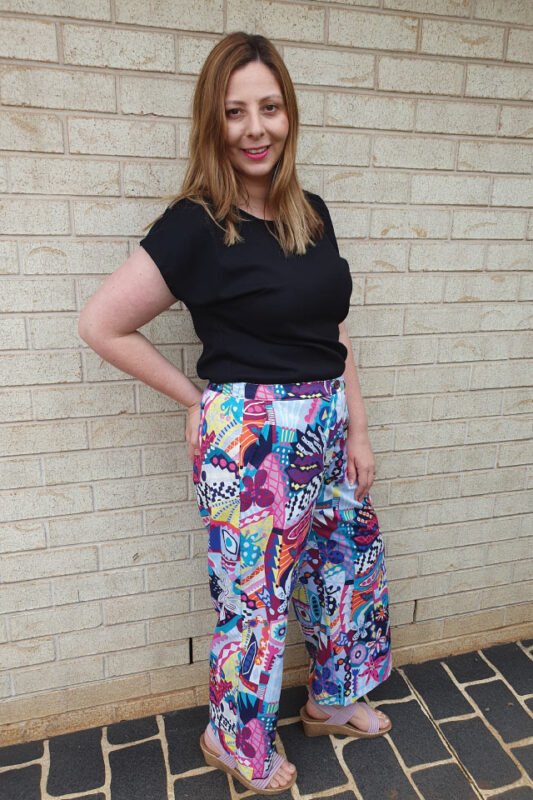
Hello, my name is Elise and I live in Queensland Australia. I am so happy with how my Estelle Pants have turned out. So often I sew pants, and they just don’t fit right. The instructions that are provided in the pattern will help you achieve the perfect fit. Getting your fit right is the most important step of the Sew, take your time read all the instructions, measure twice, cut once. I wore my pants out last week and someone literally stopped me in the street to tell me that they loved my pants. I use linen in big bold patterns, as a fabulous pair of pants can be such a statement piece. I have another pair already cut out and ready to sew. Happy sewing.
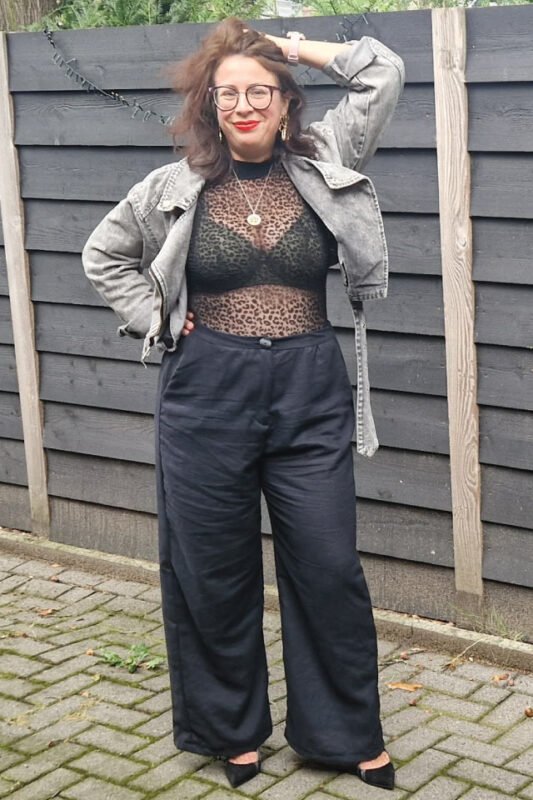

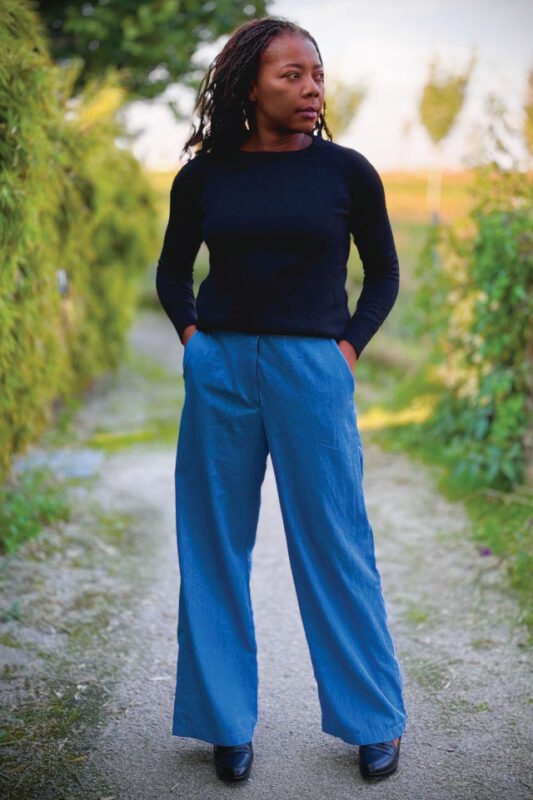
Hi all, Jose here.
Thank you for checking out my Estelle pants! I love my pants; I made them in a black linen, and they wear like a dream. I think the tailored high waist pant is very on point this season and it’s just the thing I love to pair with a mix of fitted and oversized clothing.
I like the look with heels, a body and jeans jacket, but I would also wear it with a sneaker and cropped top. Or with a oversized blouse knotted at the waist. Plentiful of options for pairing. I made my usual sizing, I’m of regular length but I do have a longer type of booty so I need to add length in my rise. There’s a new addition in the instructions with this pattern that helps you define if and how much rise you need to adjust for your fit. If you do this, take your time to measure the right way, you’ll probably be like me and do not need to adjust anything. Yes, this was my first fit. Final fit. how’s that for proper pants fitting! I’m sure you can do it too, just get to it and follow the instructions by the letter. And yes, Ann will be the proudest for your diligence at doing this.
By the way, if you like to comment personally at my makes, come on over to my personal Instagram page at https://www.instagram.com/jose.vernooy
hi everybody! My name is Sandra and I’m from the Netherlands. When I saw pattern Estelle, I thought – this is nothing for me. I normally wear fitted pants. Because it’s designer stitch, I thought… give it a try. And WOW what was I wrong… it’s so beautiful!! So am so glad I did this. I used a viscose linen. It’s so comfortable .
My sewing tip is to read the instructions and measurement recommendation very carefully. Especially about the crotch etc.
I definitely will make more Estelle, I think around April, when we have spring.
https://www.instagram.com/sandra_wilbrink_sewing
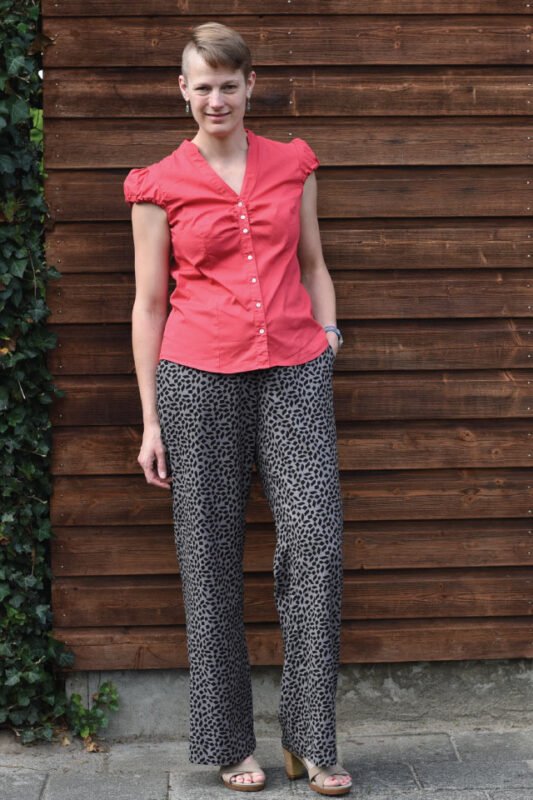
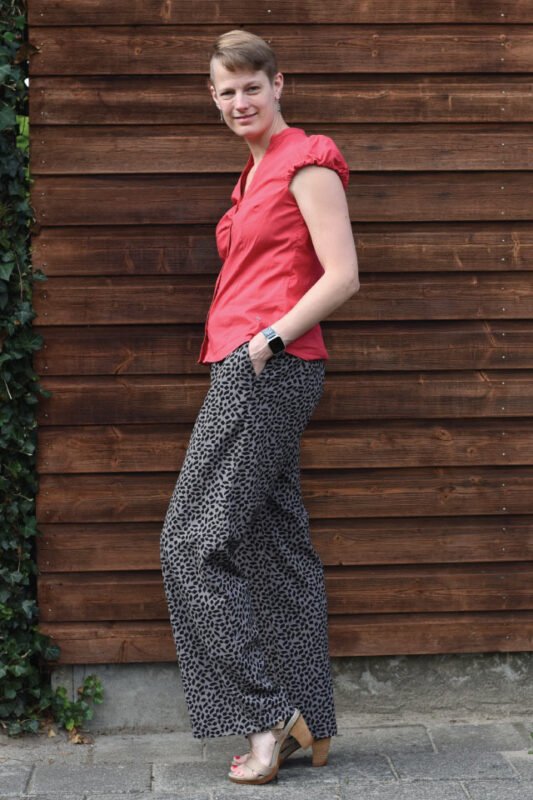
Greetings from Vienna, Austria. I am Sophie.
I made 2 Estelle pants. I used a lightweight denim and a viscose linen blend for the patterned pants. I followed Ann’s very detailed instructions for adjusting the rise and I am very pleased with the fit. As usual, a toile is a MUST! It seems like extra work, but you will get a beautiful pair of pants if you heed your body specific adjustments. I lengthened my crotch 1,9cm front and back.
I have been wearing the denim pair a lot. It’s so comfortable and I have been receiving lots of compliments. I will be making a dressier version just haven’t found the perfect fabric yet
https://instagram.com/sewmuch_better
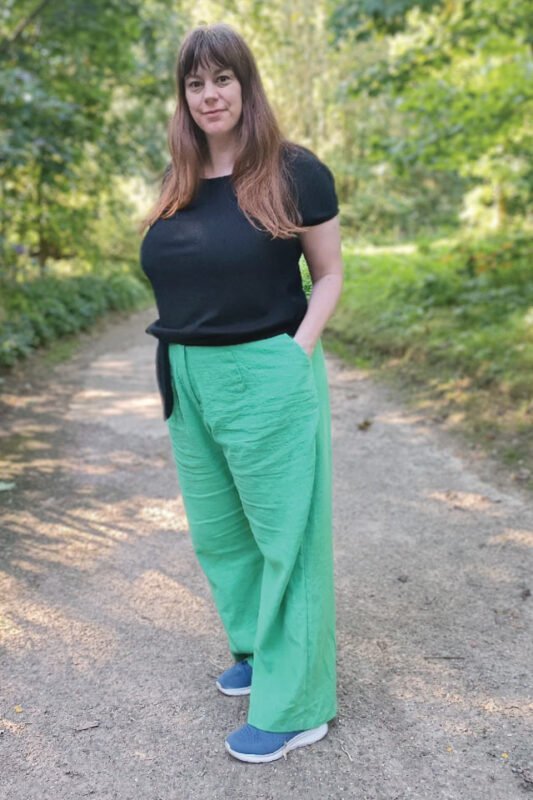
I’m Caroline, living in Brussels. So far I made 2 Estelle’s: One in linen, one in a gabardine twill. I consider my green linen ones more of a casual wear, while the grey gabardine twill can be both dressed up and down. I have worn both several times already. Whenever I want to wear trousers, I now find myself instinctively reaching for these. As thanks to all Ann’s fitting explanations in the tutorial, I now have trousers which fit. (a new sensation for me personally, what a difference that makes!). I added a few cm’s to the crotch length (back and front), gave myself some more tummy room and shortened the inseam. I also tapered the legs a bit at the side seam. I recommend finishing frying fabric before attaching the waistband. I’m very thrilled (and proud) to have sewn well-fitting trousers. I’m sure many more will follow.
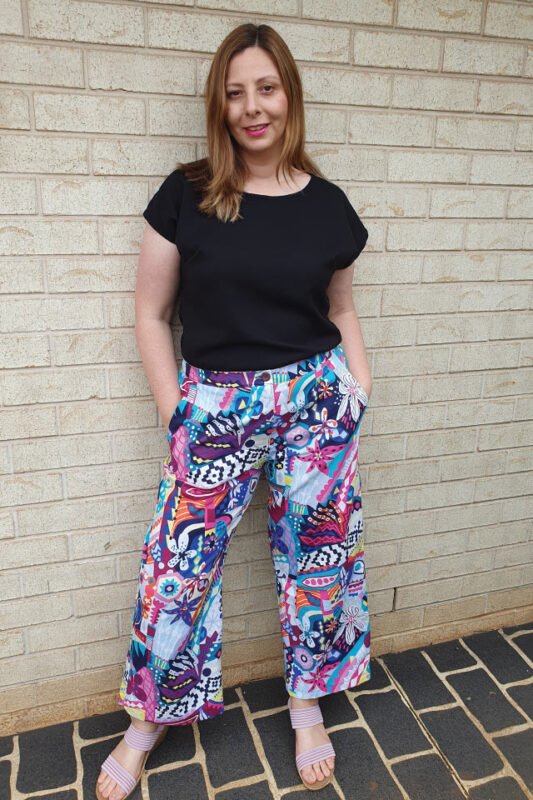
Hi, my name is Meiling and I am from Perth, Western Australia.
I chose a Premium Linen which is purchased from www.spotlight.com.au
Be sure to follow the instructions on how to measure your crotch and bottom for the perfect fit! Also ensure you overlock your edges of linen as they will fray heavily.
I chose to add the full functioning welt pockets.
I needed to take in my side seams a little for a better fit. My crotch measurements were lucky to match the pattern size I printed.
I have worn my Estelle and did receive compliments on them, and I also love it when I can say ‘I made them!’.
Definitely plans to make another set in a pale pink/peach linen colour.
My Facebook page is www.facebook.com/Sewaholic Creations
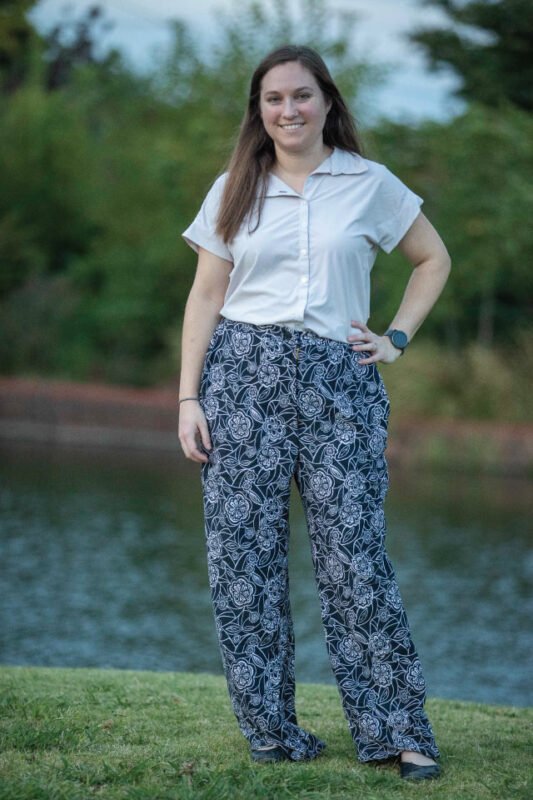
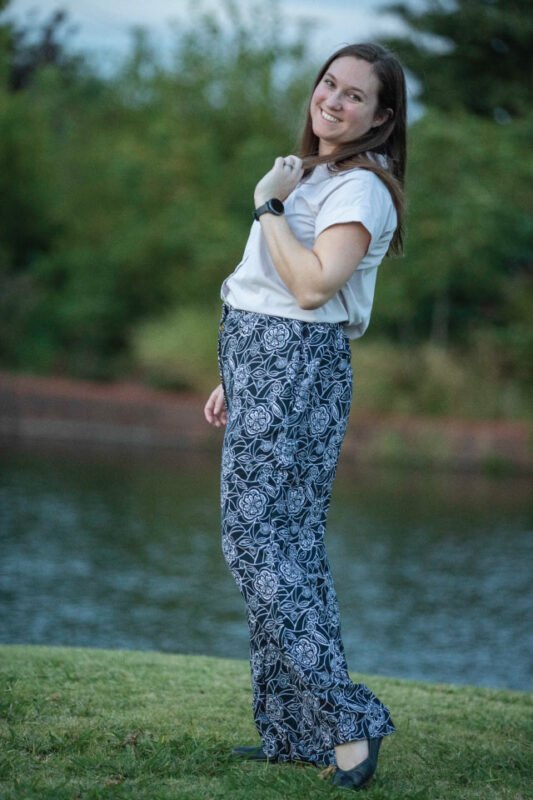
Hi! I’m Stephanie from Oklahoma USA. I used a fun black and white floral tercel print from Goldie Oldings Fabrics. Estelle is a pretty straight forwards sewing and really the key is just blending for your size. I have a size 7 waist and 5 hip and my first toile keeping the size 7 hip was much too large so I graded down at the hip (as I should have and was just being stubborn about) and was good to go. I added 1″ to the crotch seam as directed in the tutorial so nothing rides up oddly. I’ve been wearing out and about to the office and different appointments and love how comfy they are. I have been wearing them with everything from layered cardigans to blouses because you can’t go wrong!
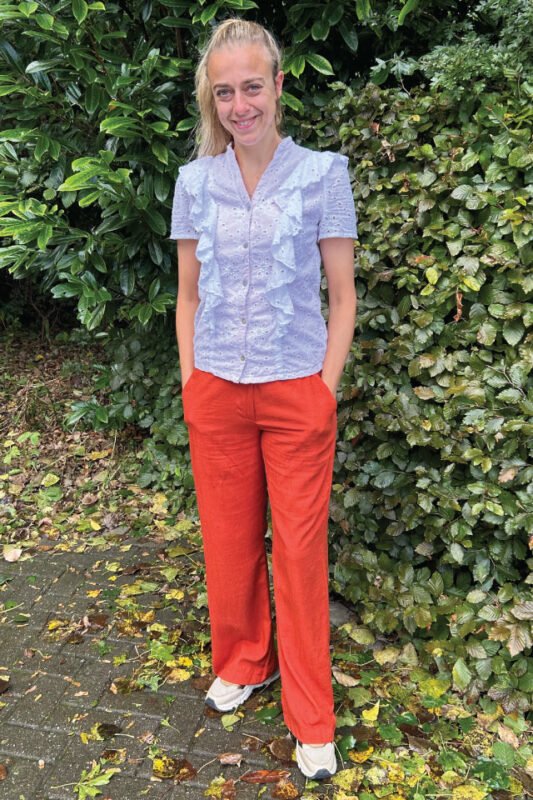
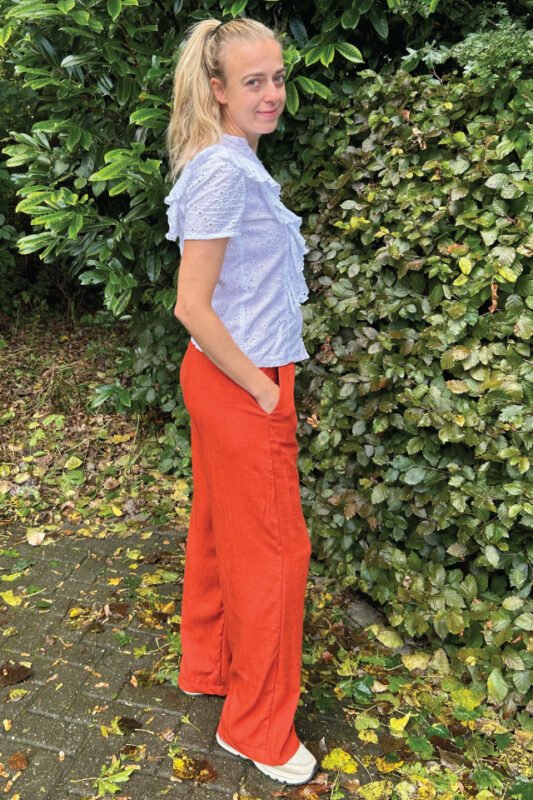
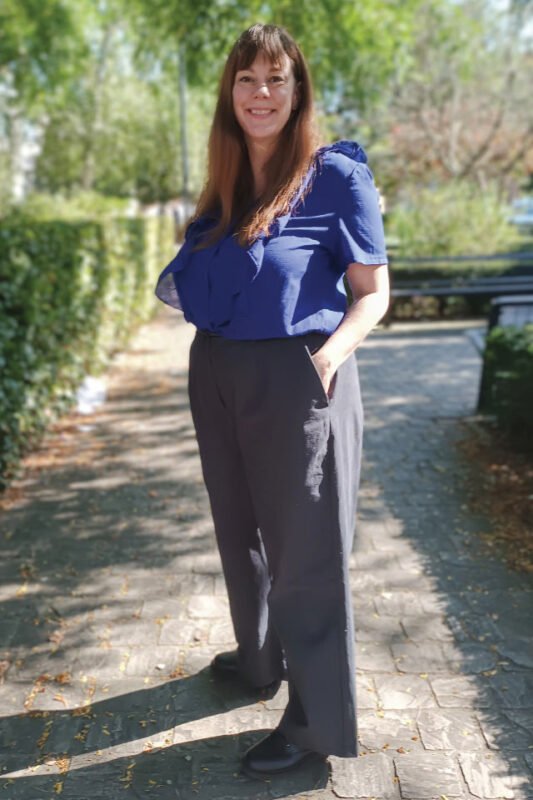
I’m Sarah from the UK. I used a twill type fabric to make trousers suitable for work.
I used a size 6.5 waist graded to 5.5 hips, I also removed 3cm from the length so I could wear my heels with my trousers.
However, the next pair will be in a lovely green linen and I’m planning to shorten the length by another 3cm so I can wear flat shoes with them.
My top tip is following Ann’s fitting guides and tutorials then you will have perfectly fitting trousers
My insta is www.instagram.com/bobbin_tails
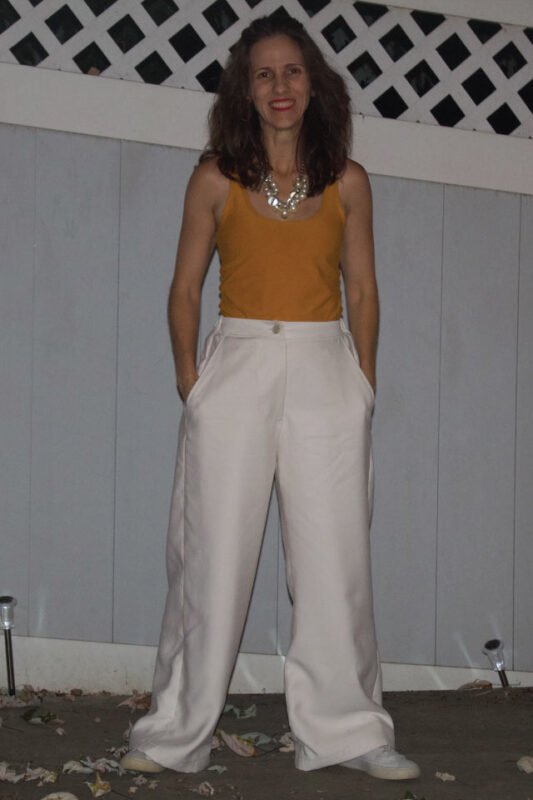
1. Jocelyn but my Facebook name is Joy due to my business and job. California.
2. A linen-like fabric in cream; I originally wanted this color to go with a cream top that I love and wanted an all-cream outfit. I got it from a local small business called Nancy’s Fabrics.
3. Don’t do it at night. I did the pockets on the same side and had to unstitch. Did the fly facing/shield slightly wrong and had to fix it. lol
4. Not many options but didn’t do the back faux pocket. My butt is big enough didn’t want more attention drawn to it.
5. I actually did only one small adjustment–I went up a size on the crotch length. Oh, not an adjustment of the pattern but I doubled up on the fabric since the fabric was semi-see through and didn’t want to take a chance that it would be see through once on.
6. I have worn it a few times already! No compliments, but that’s also a compliment! People think it’s RTW.
7. Next time I’ll also make the elastic and back band smaller.
8. https://www.instagram.com/stitchingitdone/