Fitting
how to blend sizes between waist and hip
Fuller Waist compared to a Smaller Hip Size.
Another teachers Hat !!!. Good Morning to you all.
One of our fabulous pattern testers – Stephanie KT – had to blend sizes for her Estelle Pants pattern.
She has a size 7 for the waist and a size 5 for the hip area.
Stephanie’s original toile she elected to trace off a size 7 all around.
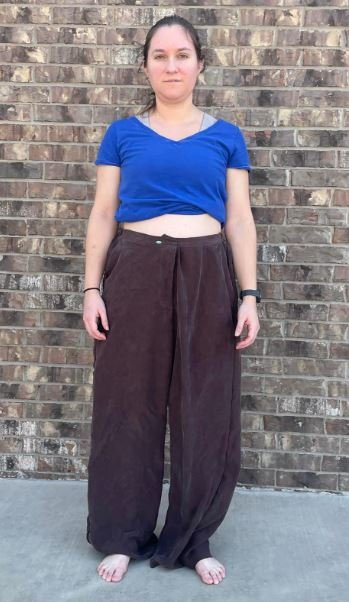
But this makes the area below that waist area 10 cms too big for what the body requires. (size grade on these pants is 5cms (2″))
And will result in wider than needed leg widths. As you can see by the image above Stephanies hip area and leg width is way too full for her body frame.
And this is why it is a joy to work with multi sized patterns – so you can BLEND between sizes.
This image shows a size 5 leg highlighted in red and a size 7 leg in blue.
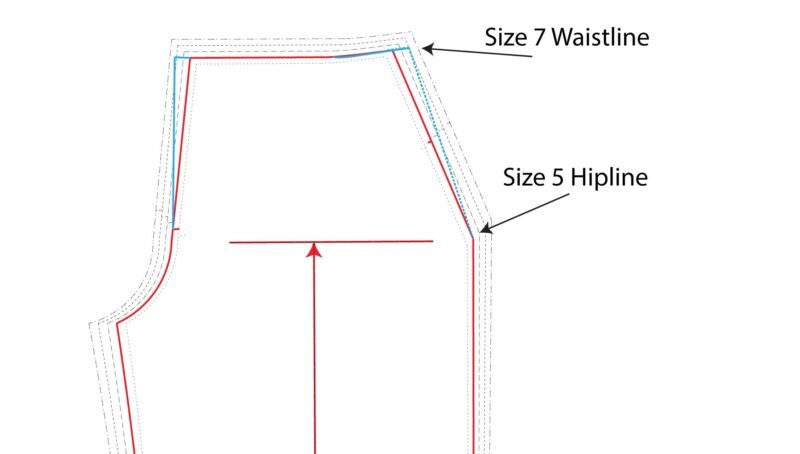
As size 7 is only required in the waist area blending of sizes is only done between the high hip vertically up to the waist.
Because the pattern has a slant pocket the slant is now at a different angle than its base size/design.
So now both pocket pattern pieces must alter to reflect this change.
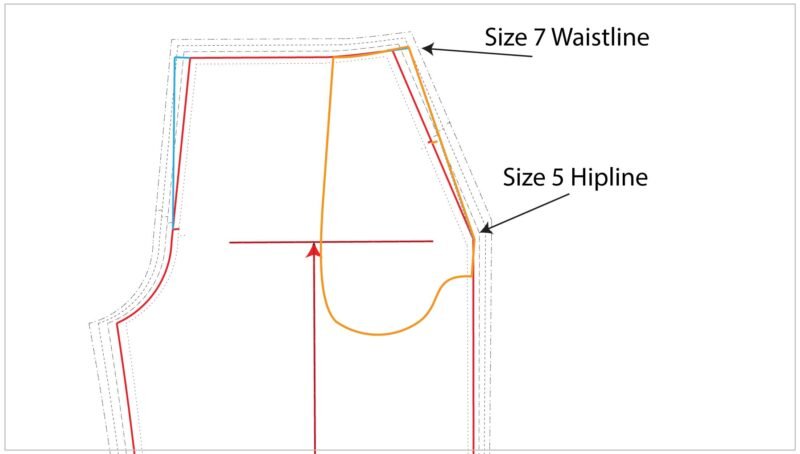
Pocket Facing – add some scrap paper around the perimeter of the pattern on the side of the piece. Lay pattern over the top making sure you align pocket edge of the facing piece with the new pocket angle on the front leg.
Re-draw top edge/lower edge of pocket to match the front leg.
Lay pocket bag on top of pocket facing and re-draw edges as you did for pocket facing.
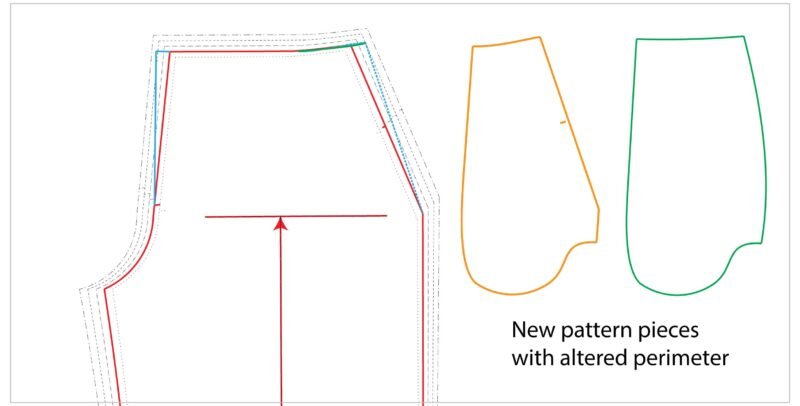
And that is it. Easy task to complete and you are now working with a re-sized pattern that reflects your own body measurements.
Smaller Waist compared to a Larger Hip Size.
But what if your waist size was markedly smaller than your hip size? This is also an easy alteration.
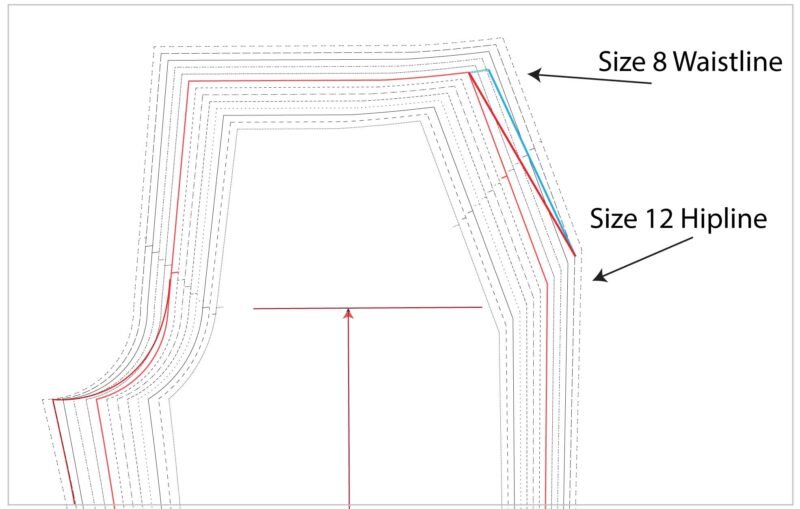
The above image shows the graded nest of the front leg of the Estelle Pants.
One of our pattern testers – Deidre R – had to blend her size from a Size 8 at the waistline to a Size 12 at the hipline.
This result is the pocket angle being too acute and will also result in an un-natural pocket opening slant.
To correct the un-natural pocket slant, we increase the blend of the waistline up by 2 sizes difference between waist and hip.
Now the waistline size is Size 10 (instead of the body measure size of Size 8) and the hipline remains at the size 12.
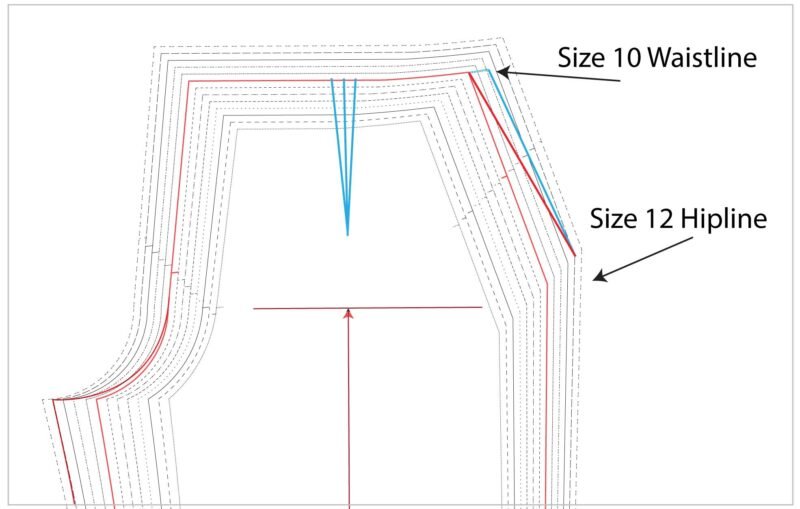
But this does increase the circumference of the waistline by 2 pattern sizes on the pattern itself which now has to be taken up in a waist dart.
The ascertain the size of the dart it is the difference between the size 8 and size 10 pattern lines of the pattern.
As the grade is 6mm (1/4″) per size – on this side seam – the total dart value is 1.2 cms (1/2″).
The dart is plotted 1/2 way along the waistline – is a total of 1.2 cms (1/2″) wide – and is 10 to 12 cms (5″ to 5 3/4″) in length.
It is drawn perpendicular to the waistline itself.
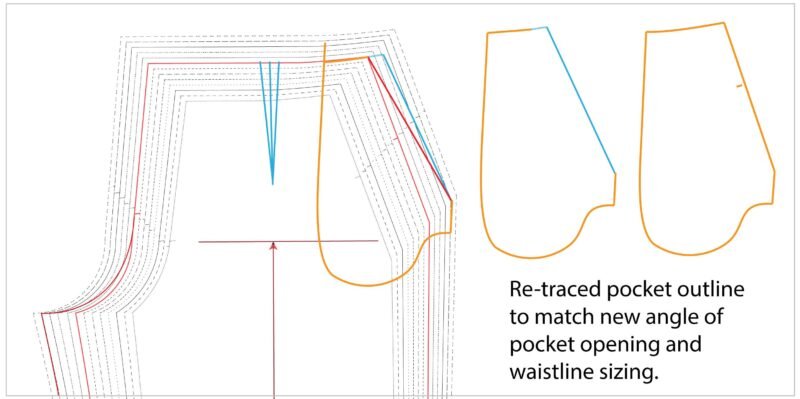
The pocket facing piece is laid back over the front leg and the outer edge is re-drawn to match the adjusted pocket slant.
The Estelle pants are an ideal all year-round – wardrobe staple. And can be made in a fabulous myriad of different fabrics.
I hope that you are able to add this to your knowledge bank of pattern adjustments know-how.
Love to you all.
Ann at Designer Stitch.