Fitting
the process of pants fitting and adjustment
Mini teachers hat! Hey there. Good to see you come over to our new blog post to follow the pattern alteration/fitting journey our Barbara B undertook when pattern testing the new Estelle Pants.
But I will back track a little bit as I had a great question asked of me by our France Langlois.
France is another pattern tester who also undertook the pattern test for the Estelle Pants alongside Barbara B.
France commented – in our Facebook pattern tester group that “given my pants block is drafted for someone taller than her” she couldn’t get her head around why she would have to lengthen her crotch/body rise.
Answer was an easy one for me of course – your height has nothing to do with the proportions of your vertical body.
Just because I am drafting to a specific height doesn’t mean that the crotch depth of the draft will be specific to you.
Only about 5% of the population fit straight out of the box when selecting sizing for sewing patterns).
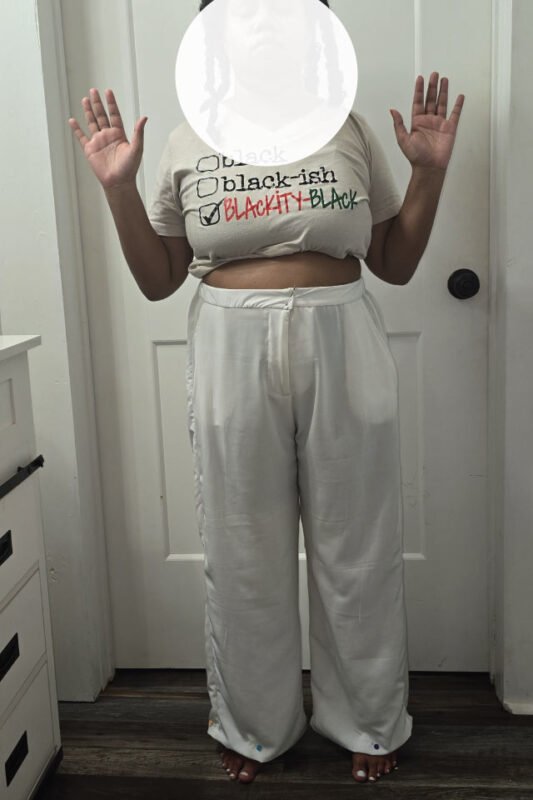
Our Barbara Beavers is making her Estelle pants for her daughter Tashara and pm’d me fit pics. She is only 4ft 11″…but has a very long pelvic frame/body rise.
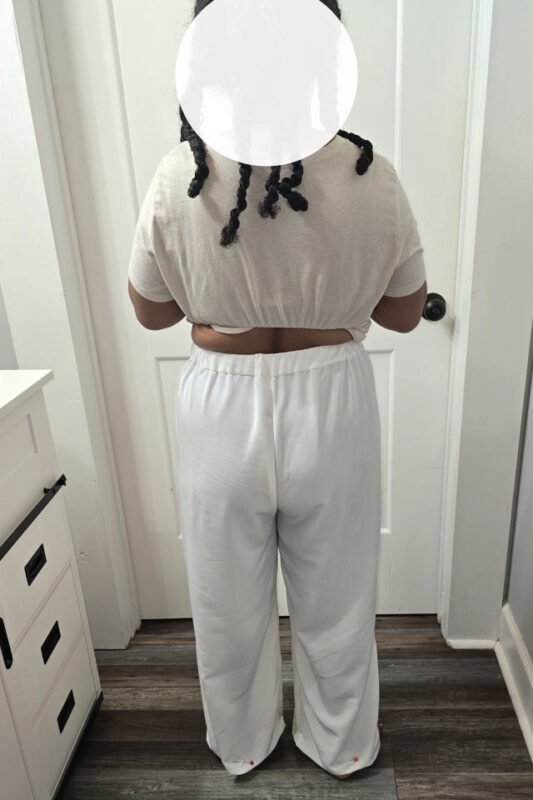
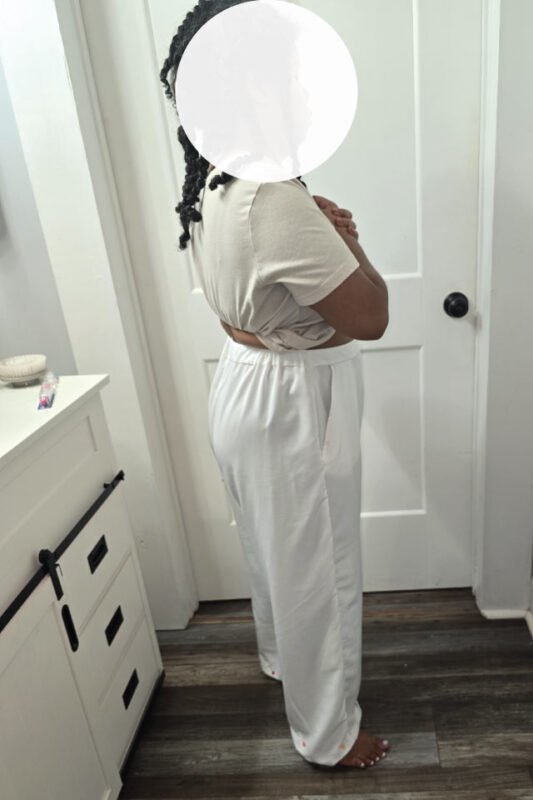
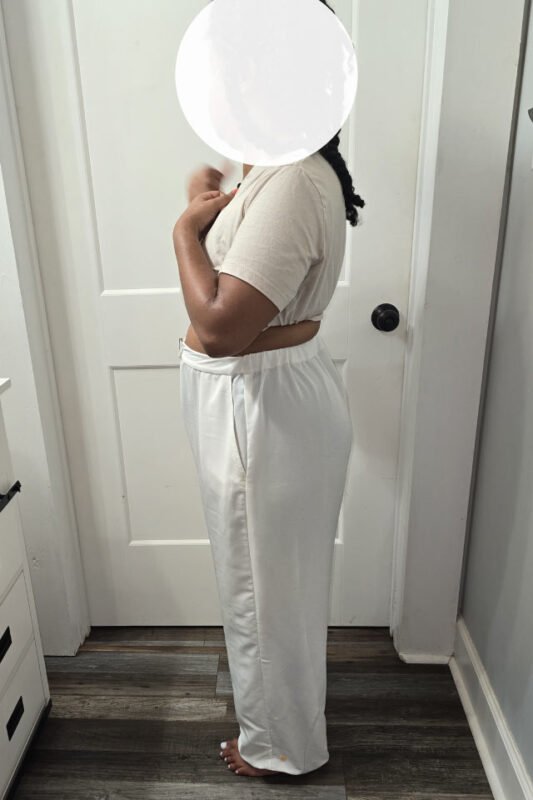
It is obvious in the above pic that Tashara has quite a long pelvic frame.
Using the alteration guide – as detailed in the Estelle Pants Sewing Instructions – our Barbara Beavers was able to complete some pattern fitting alterations to make her pants pattern replicate her daughter’s body measures.
Tashara has some significant changes on her pattern so I thought it would be a great idea to document the process as Barbara made her alterations.
The pattern changes aren’t hard – you just have to make sure you are using sound measurements and are logical in your step process.
So, let’s begin the pattern changes. Barbara had to alter the body rise/crotch depth, and leg length of the pattern.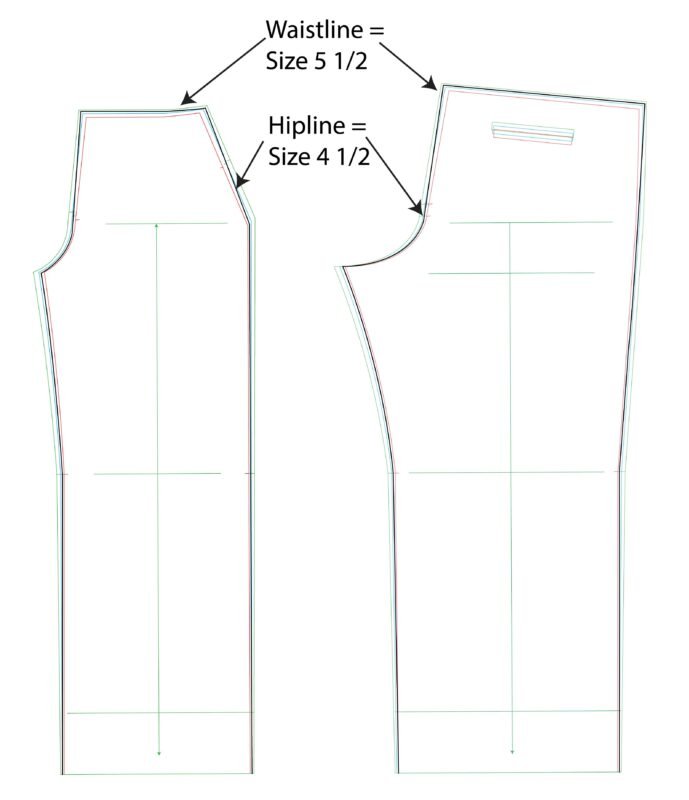
Step 1. (above image) Trace off the pattern size from the nested pattern according to what is needed.
Here Tashara needed size 4 1/2 at the waist and size 5 1/2 at the hip line.
So, sizes will need to be blended for the transition between differing sizes.
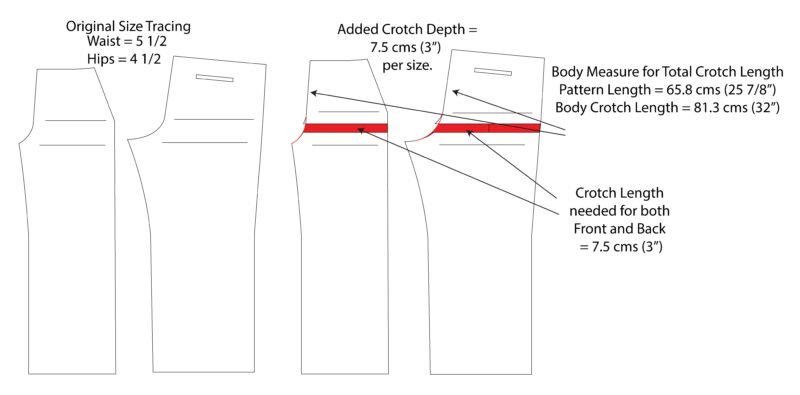
Step 2. (above image) Barbara then compared Tashara’s total crotch length to the total crotch length of the pattern (stitching line not cutting line).
Tashara’s crotch length was longer than what the pattern was drafted for, so length was needed.
Barbara added 7.5 cms (3″) to both the front and back in the upper section of the pattern.
Due to the pocket slant the cut line was made just under the slant on the front and the same vertical height on the back.
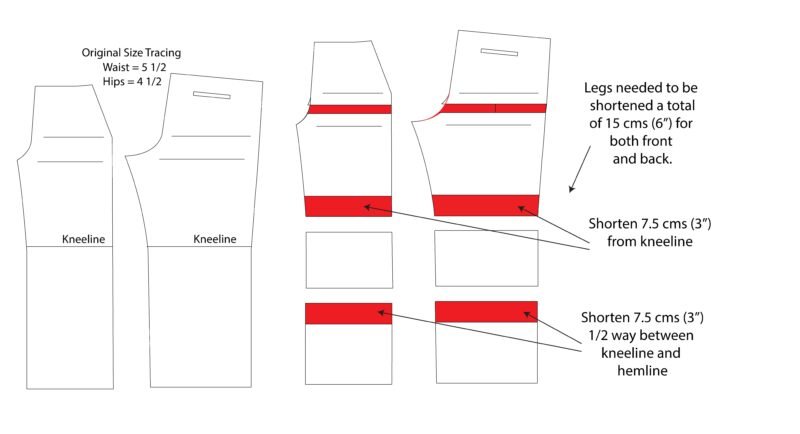
Step 3. (above image) Even though Tashara has a long body rise/crotch length she needs height adjustment in the pattern as the legs are too long for her.
Her height is 4′ 11″ and pattern was designed/engineered for around 5″ 6″.
Using the toile as a guide Barbara folded the legs of the pattern up until she reached a suitable length.
For Tashara’ final leg length it was decided to shorten both front and back leg by 15 cms (6″) in total.
1/2 of the length alteration was completed at the knee line. Extra length cut from the pattern and then re-stuck together.
The other portion of height adjustment was completed 1/2 between the knee line and hemline.
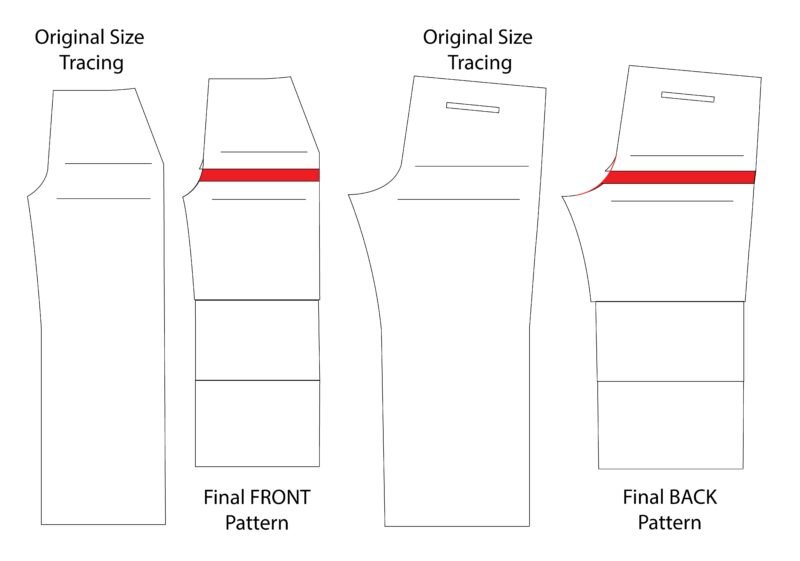
Here is the final image of Tashara’s altered pant pattern with the original tracing by its side.
You can see that even though Tashara’s pattern has been lengthened for crotch height the legs have been shortened to reflect her smaller stature.
The Estelle pants are an ideal all year-round – wardrobe staple. And can be made in a fabulous myriad of different fabrics.
I hope that you add this to your knowledge bank of pattern adjustments know-how.
Love to you all.
Ann at Designer Stitch.