Fitting
Fitting for Bust Projection and Princess Panels
Greetings my lovely sew’ist friends and thank you for visiting with me today.
Today is the start of a series of blog posts to celebrate the release of the gorgeous Madison Colour Blocked Dress and I would like to talk to you about fitting your bust projection when you have princess panels in play.
And as I have just released this stunning new pattern – the Madison Colour Blocked Dress – I am going to use it as an example.
The dress has gorgeous princess panels for shaping and contour to create its gorgeous shape.
Even though our new Madison Dress features these fabulous princess panels – along with choice of cup sizes – on occasions you may need to tweak the fit to have your garment fitting to perfection.
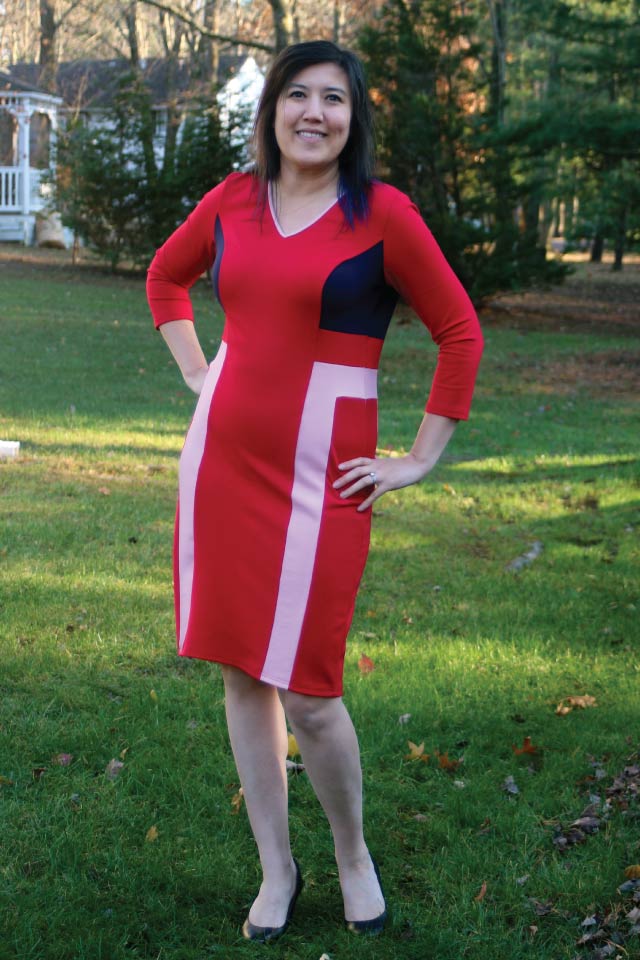
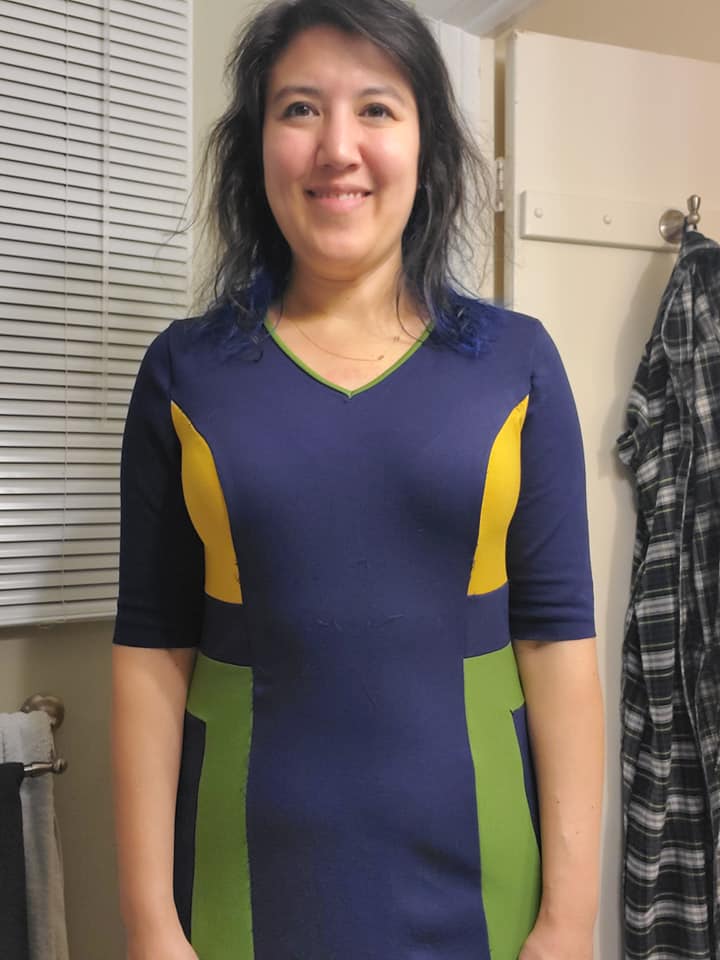
So now I would like to introduce you to one of our fabulous pattern roadies – Becky McGW – who recently road tested the new Madison. The above image showcases how gorgeous she looks in her final make. Absolutely STUNNING Becky xx.
Even though Becky choose her sizing according to both her upper bust and full bust we still had to fine tune the fit of her toile for a perfect fit.
So let me share with you our Becky’s bosom fitting journey. xx
The Anatomy of Cup Sizes
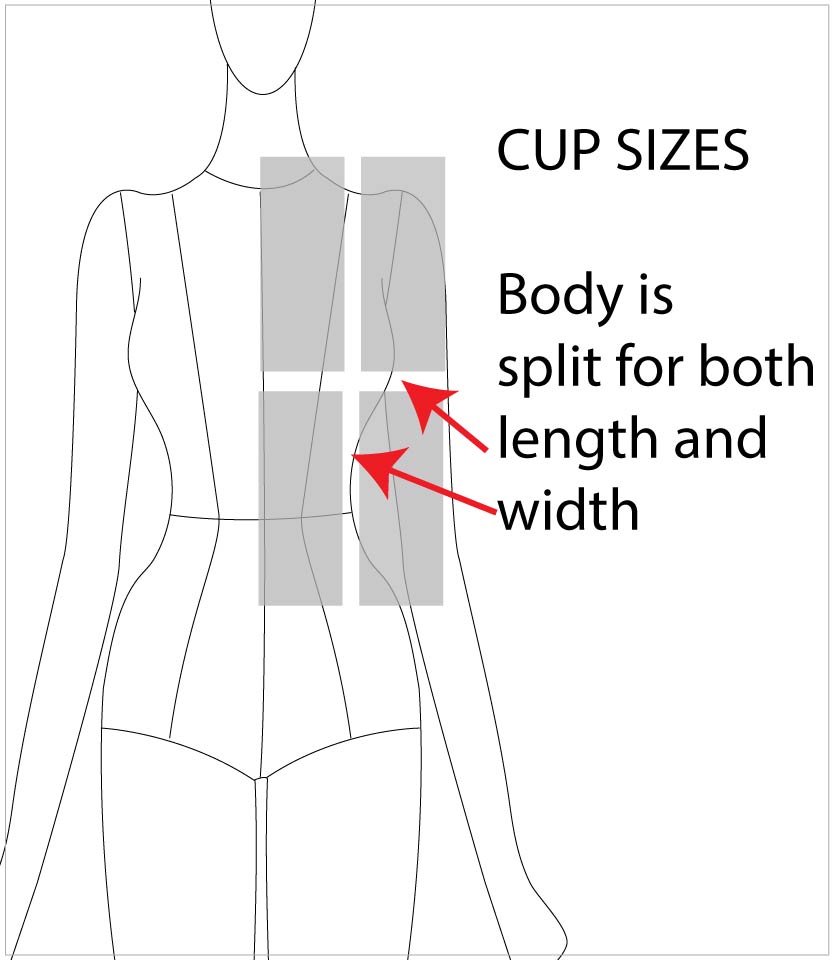
Whenever a pattern is developed to include cup sizes the front body is split for bust projection – both in width and length.
So going from a B-cup to a C-cup the body is split incrementally to a specific measure. Then the C-Cup body is then split again for a D-Cup and so on.
Side Bust Fullness.

After Becky had made her toile we found that her side bosom was a little fuller than the toile allowed for and that it created strain lines on her toile. You will see in the above image that there are strain lines radiating towards her bust point.
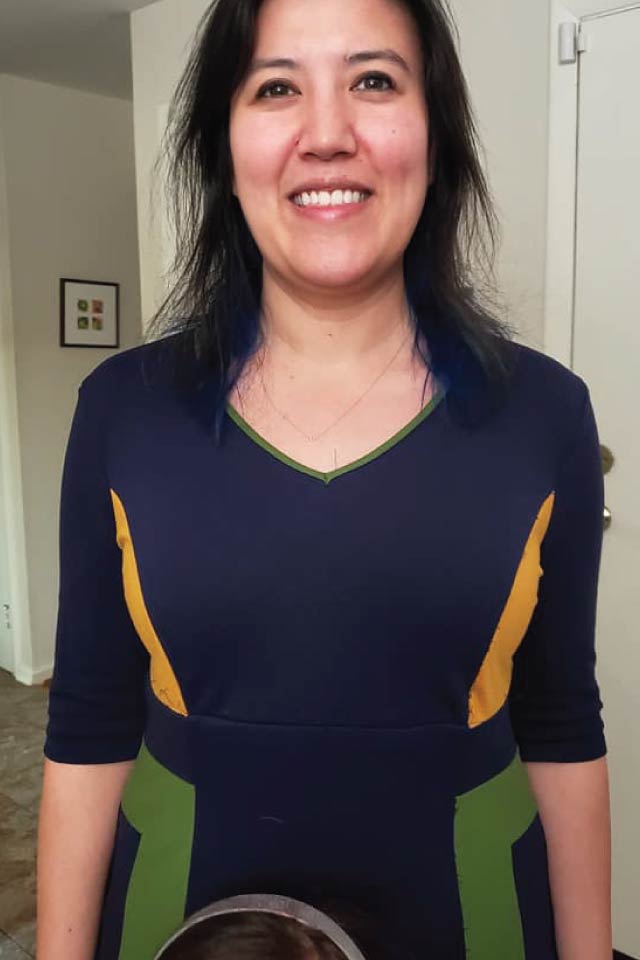
The above image shows a front view of Becky’s toile. The Centre Front panel is sitting well and the strain lines are not graduating across into this panel so I knew we only had to tweak her side panel for the fullness of her side breast.
Even though Becky chose her sizing according to her body measures we found that her side bust mound was a little fuller than the measures told us. So technically she needed her side panel to be the next cup size up.
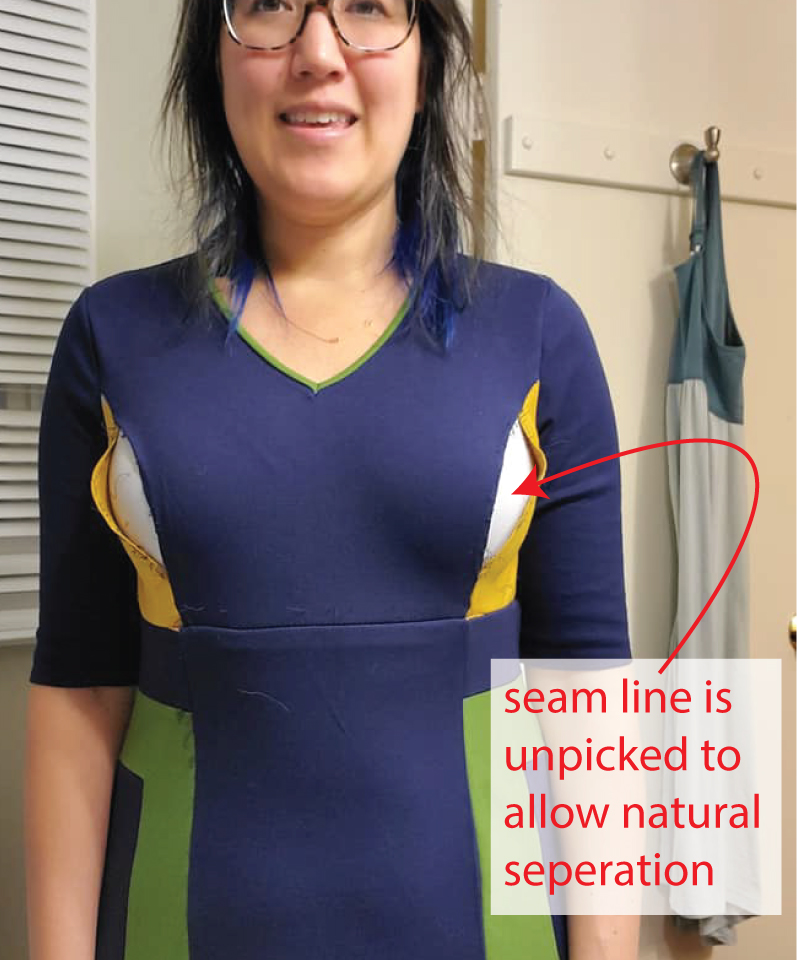
I asked Becky to un-pick/release the seam line of the princess panels in the area of her bust point – either side of her fullest bust projection area.
You will see that the side panel naturally opens up to show us that it needs more front shaping/side width.
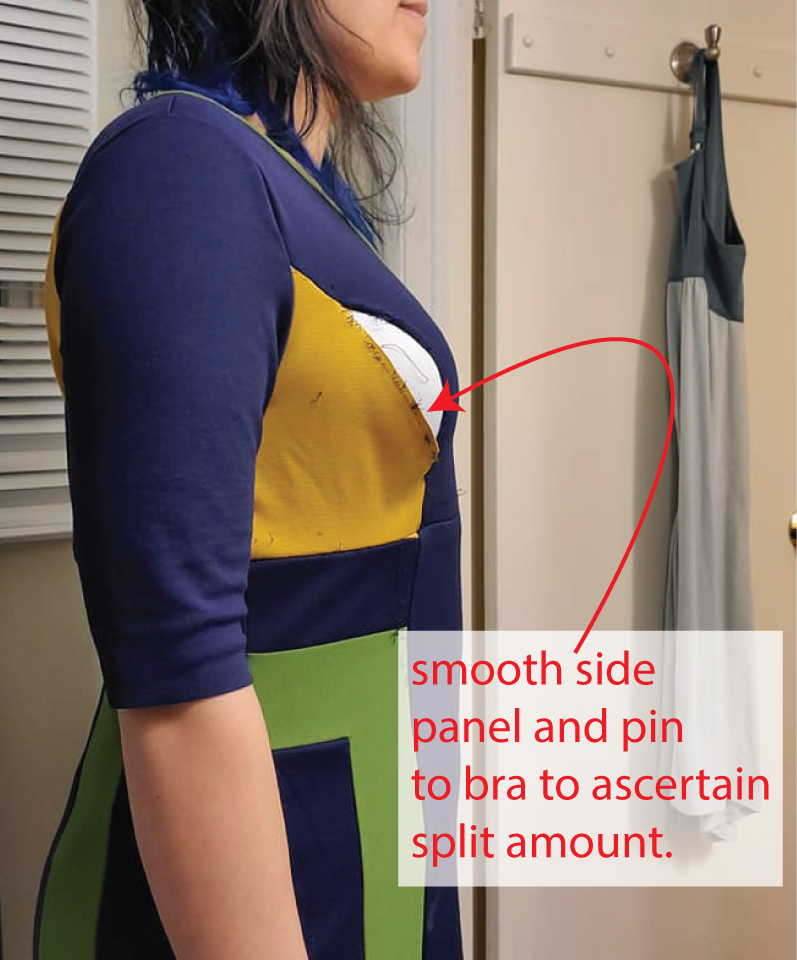
I then asked Becky to smooth the side panel against her bra and pin it into place.
Even though the above image shows quite a large area of split it actually isn’t that much in the final.
Once it has been smoothed and pinned into place a measure can be taken of the split amount.
Adding Side Bust Fullness to the Upper Side Front Panel.
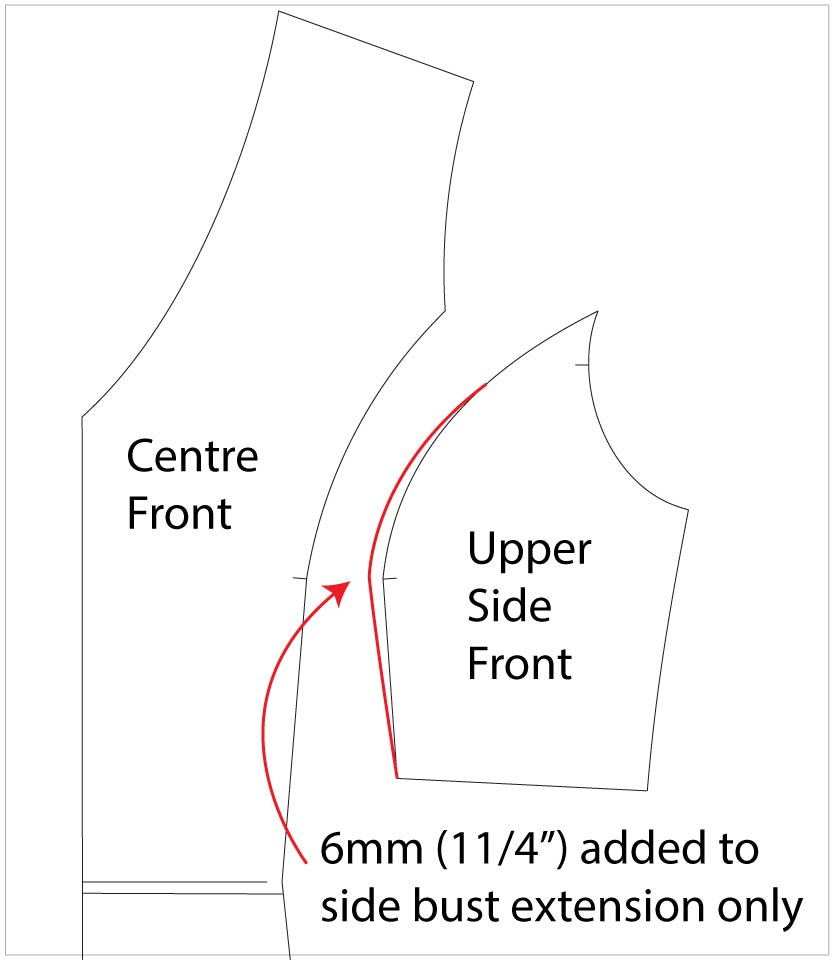
The alteration for Becky’s Upper Side Front panel was completed as the above pic shows. The extra width needed was only added to the side panel and it was approx 6-8mm (1/4″-5/16″).
The greatest amount is added at the bust projection point and then smoothed back into the curve of the panel both above and below.
Even though the outer edge length of the cut edge has now increased it rather a minuscule amount – usually 3mm approx which can be easily eased back onto the Centre Front panel.
The Final Toile.
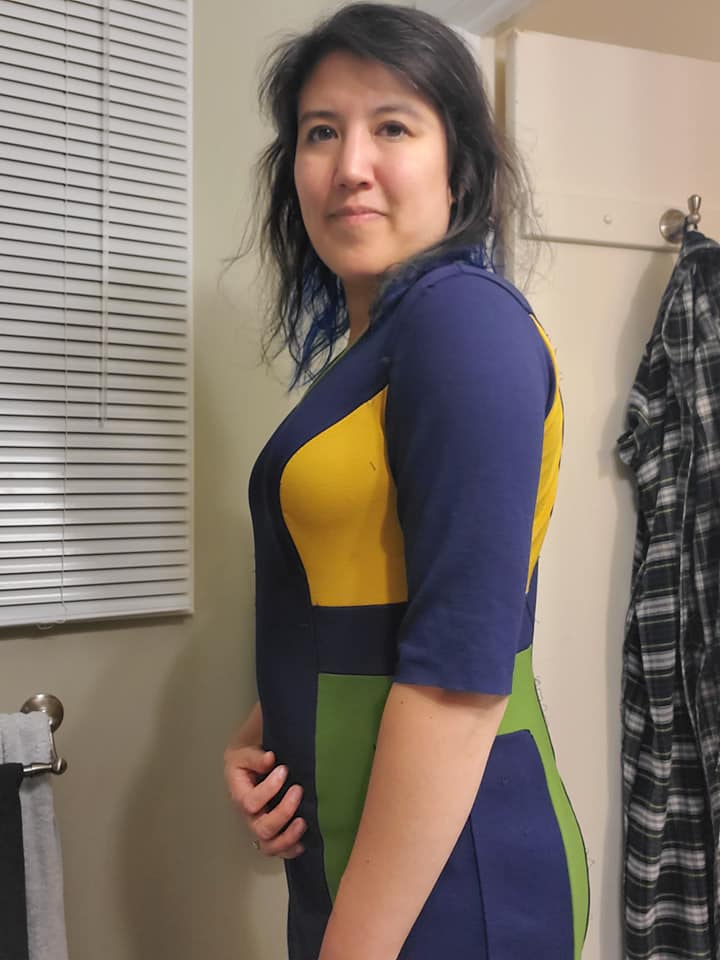
And this is Beckys final toile of her Madison Dress. You can just see that the outer tip of the Upper Front Side Panel has a little more curve on it to accommodate her fuller side bust.
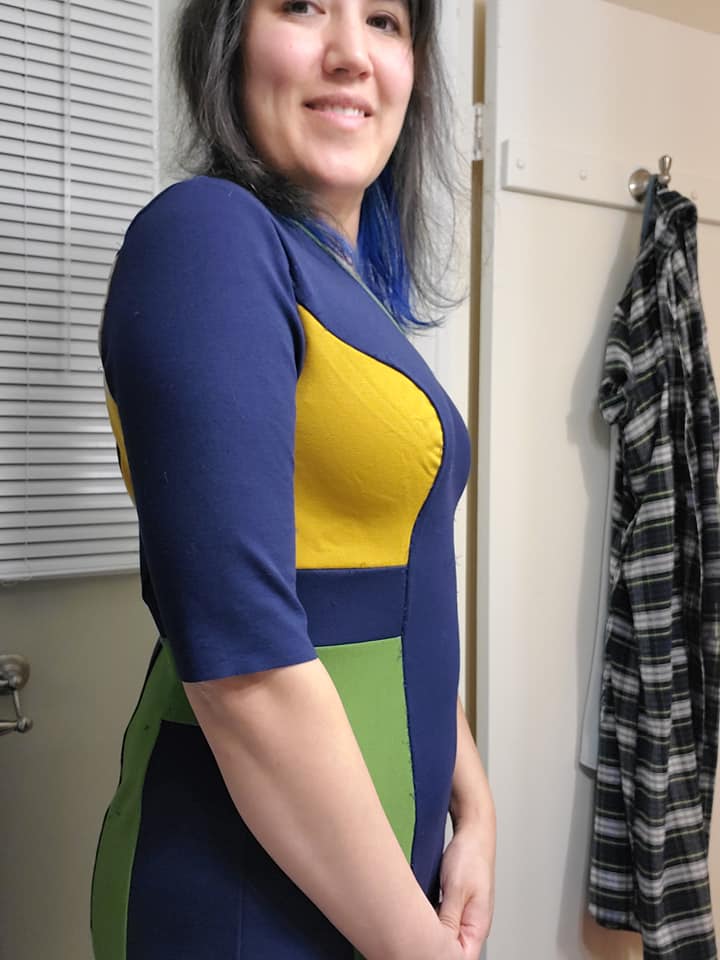
And the front on image shows that the princess panel is sitting exactly at her centre point of her bust projection.
This is quite an easy alteration as you can see but gives great results – a perfect fit for a perfect woman.
Thank you Becky for allowing me to feature your bosoms in our post today. Love to you and well done my lovely xx.
And the details of Madison Colour Blocked Dress are :
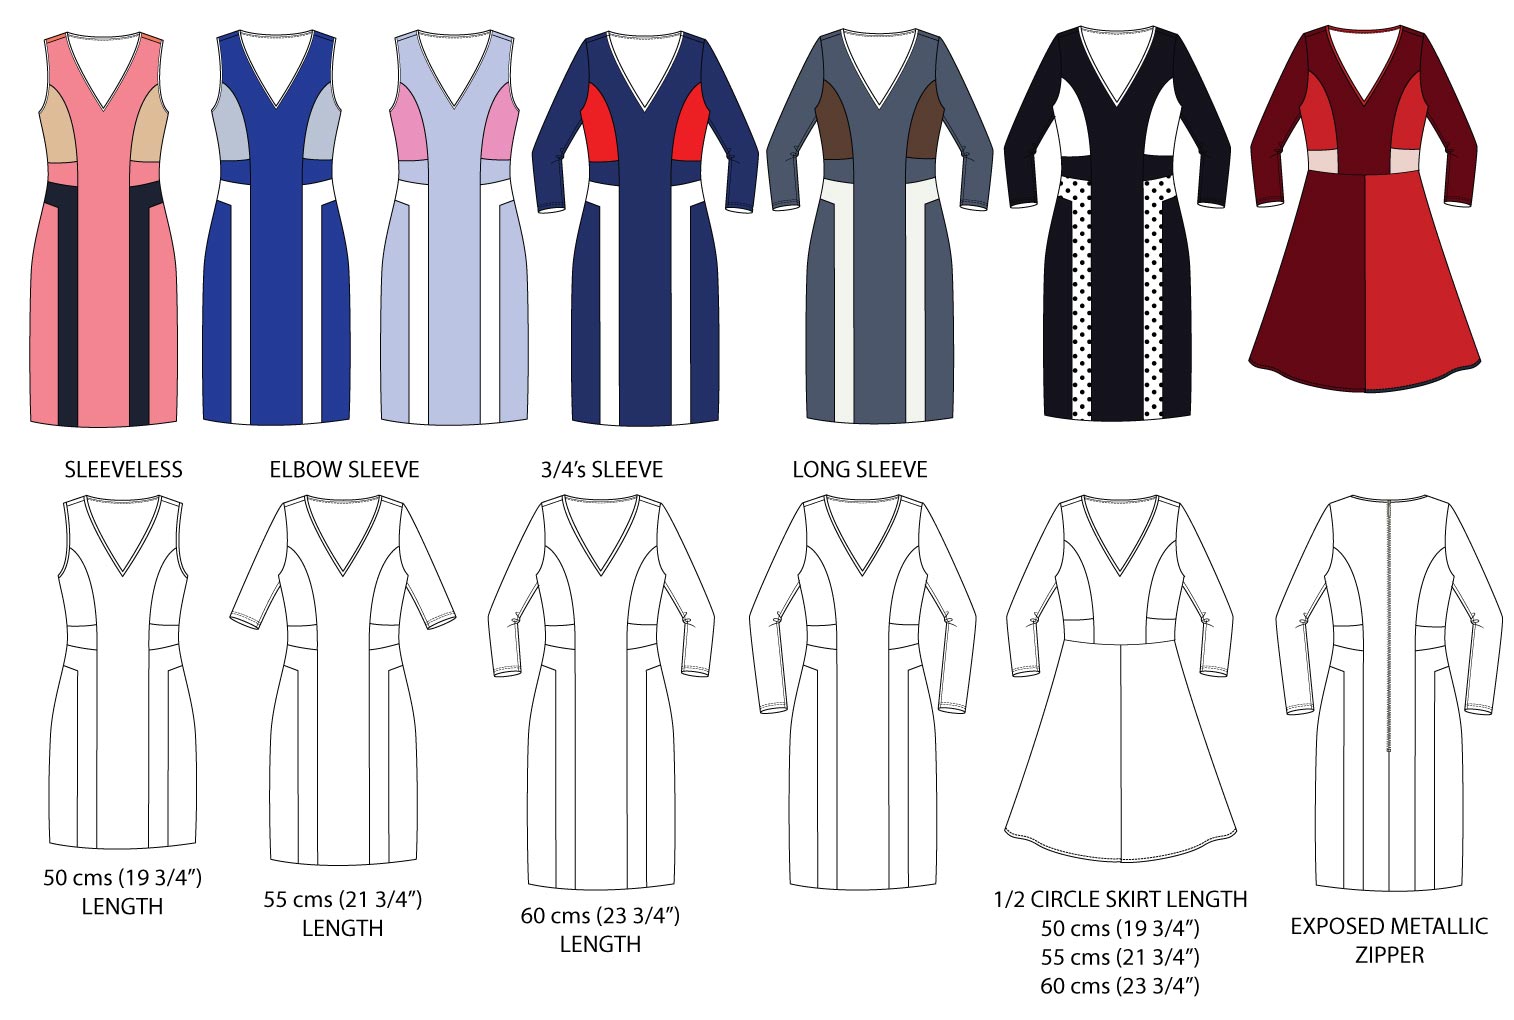
The Madison Colour Blocked Dress is for a sewing level of Confident Advanced Beginner and Above.
On Sale for a limited time only – $8.95 (US)
(AU/UK) 6 – 28
(US) 2 – 24
(EU) 34 – 56
Cup Sizes – B, C, D, DD
https://designerstitch.com/shop/madison-dress
And be sure to check out tomorrows blog post where talk with you about changing the bust point position when you have princess panels in play – it is actually quite an easy alteration.
Lots of love to you.
Cheerio xx
Ann at Designer Stitch.