Tutorial
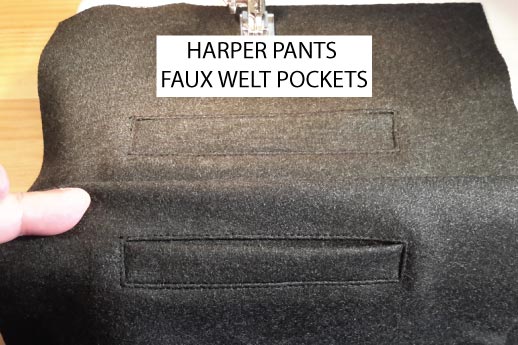
How To Sew a Faux Welt Pocket

Hello to all my sew’ist friends from around the world and thank you for visiting with me again today. The Harper pants are such a gorgeous style and really encompass the contemporary vibe to modern tailoring. Given that I thought you may like a photo “how-to” for constructing your Harper Faux Back Welt Pockets.
Now I am sure you have thought – why “faux”. Given that the pants are constructed in a heavy double knit – are figure fitting and of course flattering – the nature of the knit will skew and stretch the pockets if they were functional. And the actual welt pocket strip itself will loose shape – and we certainly don’t want a tired and baggy welt on our sexy and gorgeous bottoms do we !!!….
So lets commence sewing our Harper Pants Faux Back Welt Pockets – and PLEASE PLEASE PLEASE make at least 3 samples on some of your left over fabric before you try this technique on your final make of the Harper Pants.

Before marking your sewing guide lines onto your fabric please make sure you have “sharpened” your chalk. I use a vegetable peeler to peel the edges of my chalk sides to get a razor sharp edge. Test your chalk edge on some scrap fabric to check you have the thinnest and sharpest line possible.
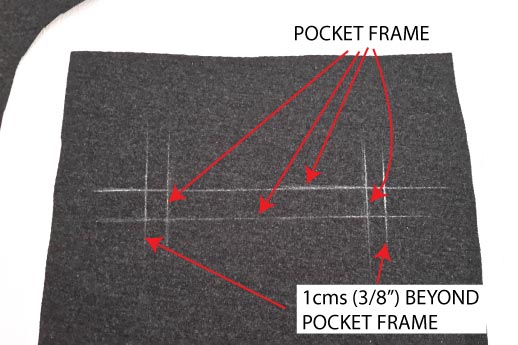
Step 1 : Mark on right side of fabric the indicated pocket frame, extending chalk lines at least 3cms (1¼”) past frame. Draw an additional line at each end of the pocket frame 1cms (⅜”) beyond the frame and at least 3cms (1¼”) past frame.
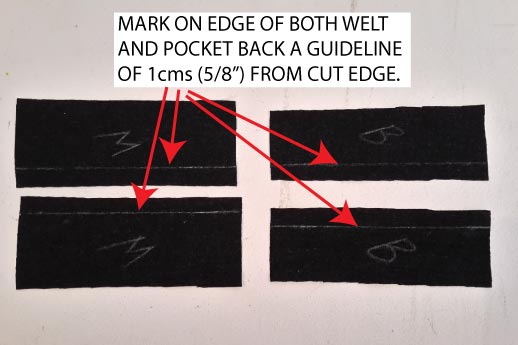
Step 2 : Mark onto wrong side of welt and pocket pieces a chalk line from cut edge of 1cm (⅜”). Complete all pieces.
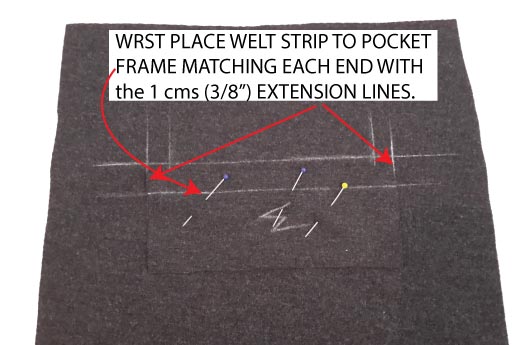
Step 3 : WRST place welt to back leg – matching chalk lines of welt to marked chalk lines on body. Pocket welt is longer than pocket frame and will marry to the second marked chalk lines completed in Step 1.
Ensure you match up all chalk lines to each other. Pin in place.
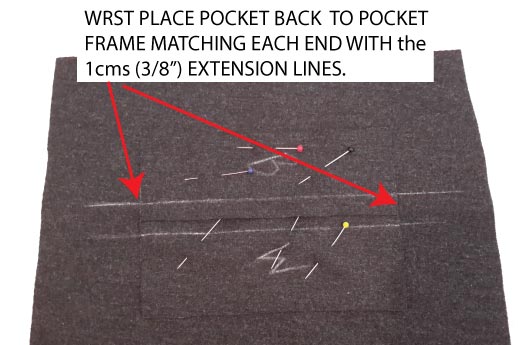
Step 4 : WRST place pocket back to back leg – matching chalk lines of pocket back to marked chalk lines on body. The cut edges of the pocket back and welt will overlap in the centre. Pocket back is longer than pocket frame and will marry to the second marked chalk lines completed in Step 1.
Ensure you match up all chalk lines to each other. Pin in place.
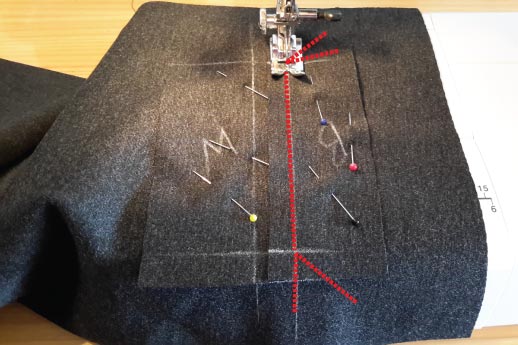
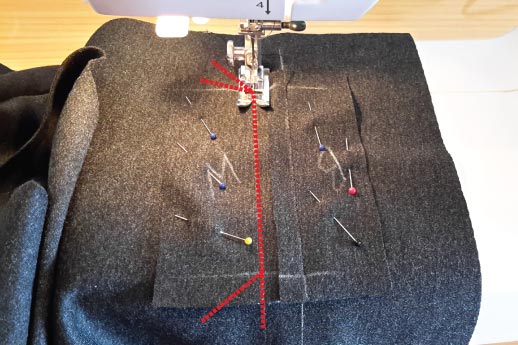
Step 5 : Stitch on marked lines ensuring you start and finish on marked chalk lines for pocket frame and that each stitch line starts and finishes at EXACTLY the SAME POINT.
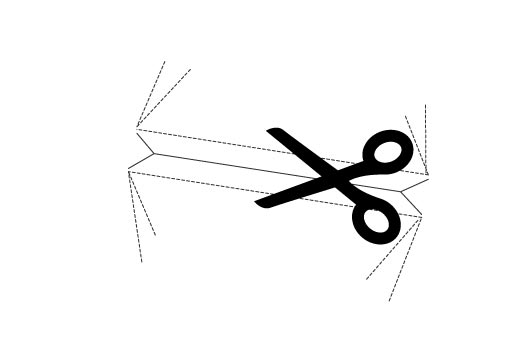
Step 6 : Cut through centre of pocket frame from wrong side of leg stopping 1 cm (⅜”) before end of stitch lines. Then cut into corner the stitch lines forming a “v”. Be careful you don’t cut beyond you stitch lines and only up to end of lines. Cut only through the pant leg itself, not through the welt nor pocket back.
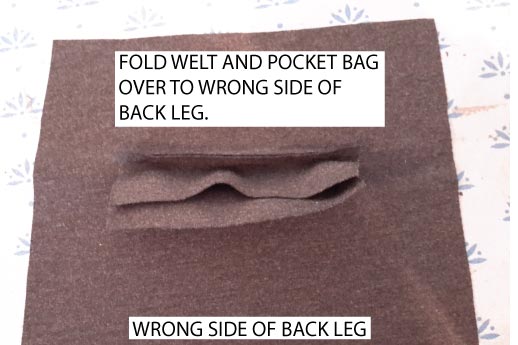
Step 7 : Fold both welt piece and pocket back to wrong side of pant leg through slash opening made in previous step.
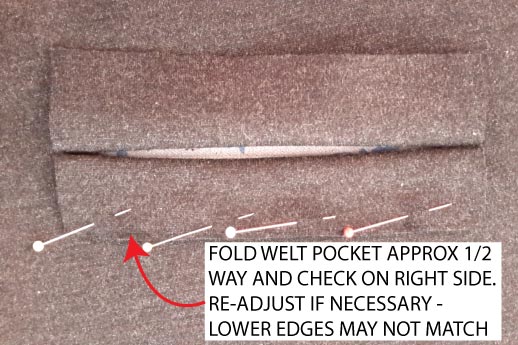
Step 8 : Fold your welt piece over on itself to form a fold that is enough to fill up the frame of your pocket while still sitting flat. Pin in place to hold.
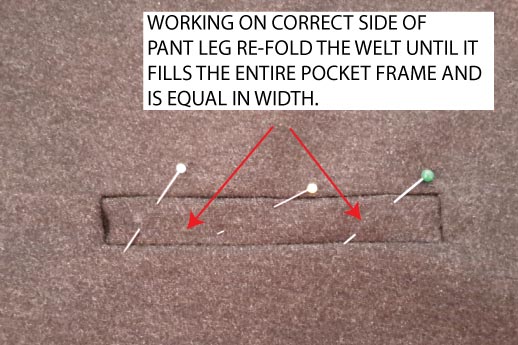
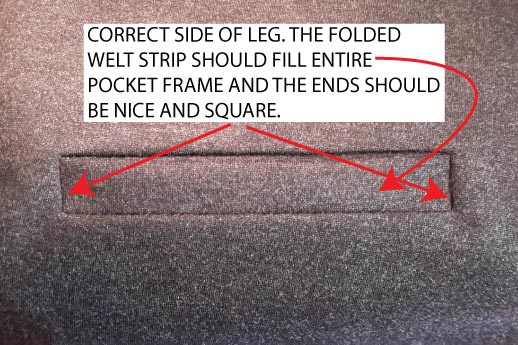
Step 9 : Working on correct side of leg re-adjust your folded welt piece where necessary until the welt is formed evenly at both ends and is sitting flat. Ensure that each end of the welt is sitting flat and not bunching the corners where the “v” cut is. Pin the folded welt in place on top of the pocket back piece that is flipped down to sit behind the welt piece. Please note that the lower edges of the folded welt piece may/will not match.
And why is this SO ?
TURN OF THE CLOTH. And WHAT IS IT ?
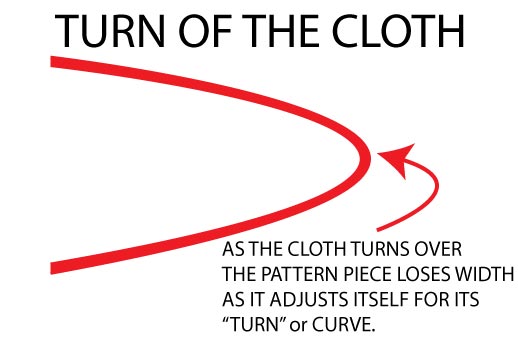
When you are folding a cut piece in half – and the thicker the fabric the more noticeable it is – you actually loose “width/length” in the piece. As the cloth turns over on itself it needs extra “width/length” to complete the turn. So when forming the welt strip in Step 8 and 9 above, the 2 cut edges of the welt itself won’t marry up. The top layer will be slightly narrower than the under layer. And that is what we want. If you were to force them to match the welt strip would not “fill” the entire frame of the pocket.
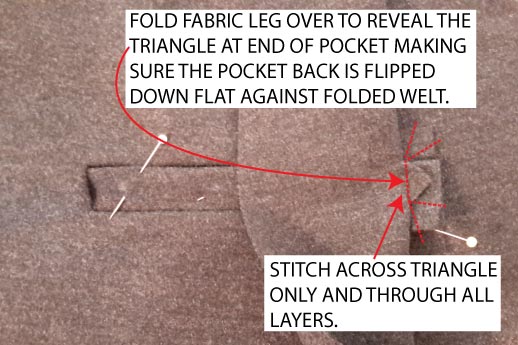
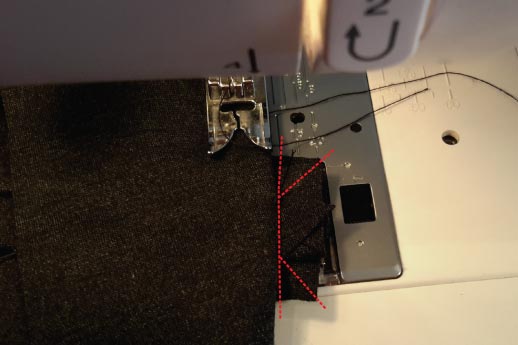
Step 10 : Fold back the edge of the welt pocket frame to reveal the “v” form at end of pocket. Stitch through all layers from top end of the “v” to the bottom. Complete both ends.
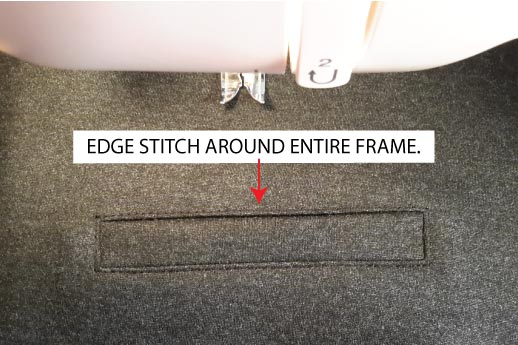
Step 11 : Pin all layers of pocket in place. Stitch around entire frame of pocket 1.5mms (1/16″) out from stitched pocket frame.

And thank you to our Ana IB, Lim BK and Belinda C for these gorgeous pictures of their Harper Pants Faux Back Welt Pockets – and also their GORGEOUS BOTTOMS …xx
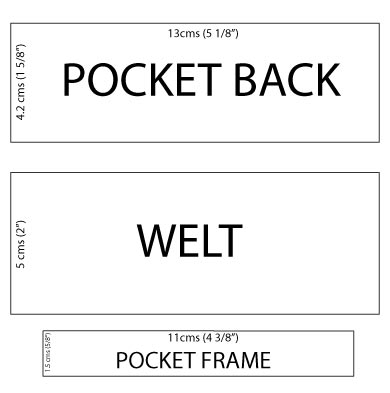
Would you like to try the above method out yourself. Here are the dimensions of the above pockets that you can draft out onto some scrap paper and cut out in scrap fabric.
And again before you hit your main fabric to make your Harper Pants you MUST complete at least 3 to 4 samples. Trust me on this one. xx
Cheerio
Ann at Designer Stitch.