Fitting
Pattern Alteration for a Sway Back
Hi Ho again my lovelies and thank you for joining me here for Day 4 in the series of Clara Dress blog posts.
I hope that you enjoyed reading the last 3 days of blog posts and if you have missed them here are your links. They make great reading.
Day 1 – Clara Dress Inspiration and Influences Post.
Day 2 – Clara Dress Tester Roundup Part 1
Day 3 – Clara Dress Tester Roundup Part 2
Pattern Alteration for Sway Back.
Today I will share with you how to alter your back pattern piece for a sway back adjustment along with my amazing pattern tester – Barbara B.
And the Clara Dress pattern offers a great base to do this with. xx
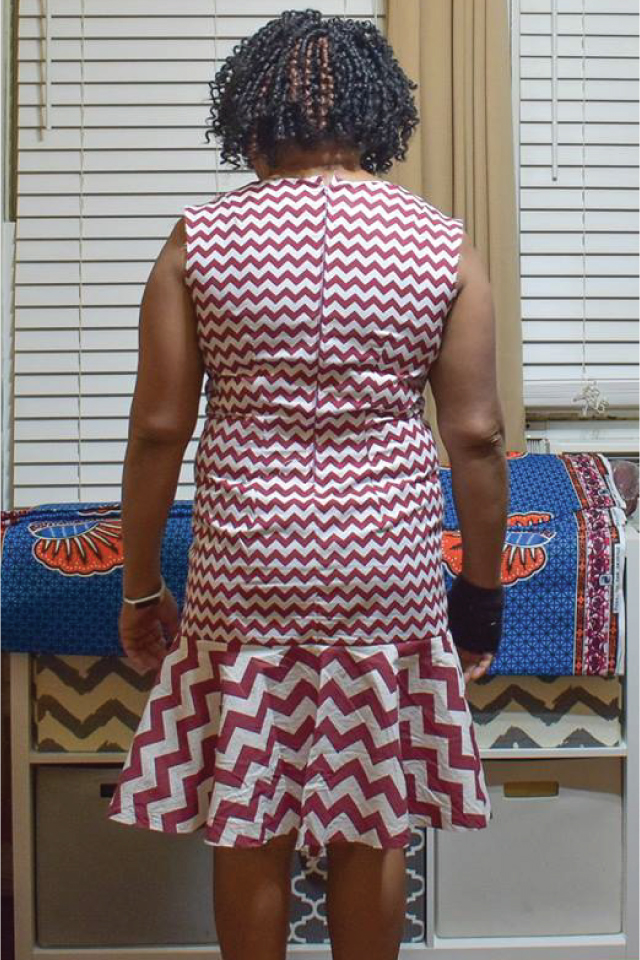
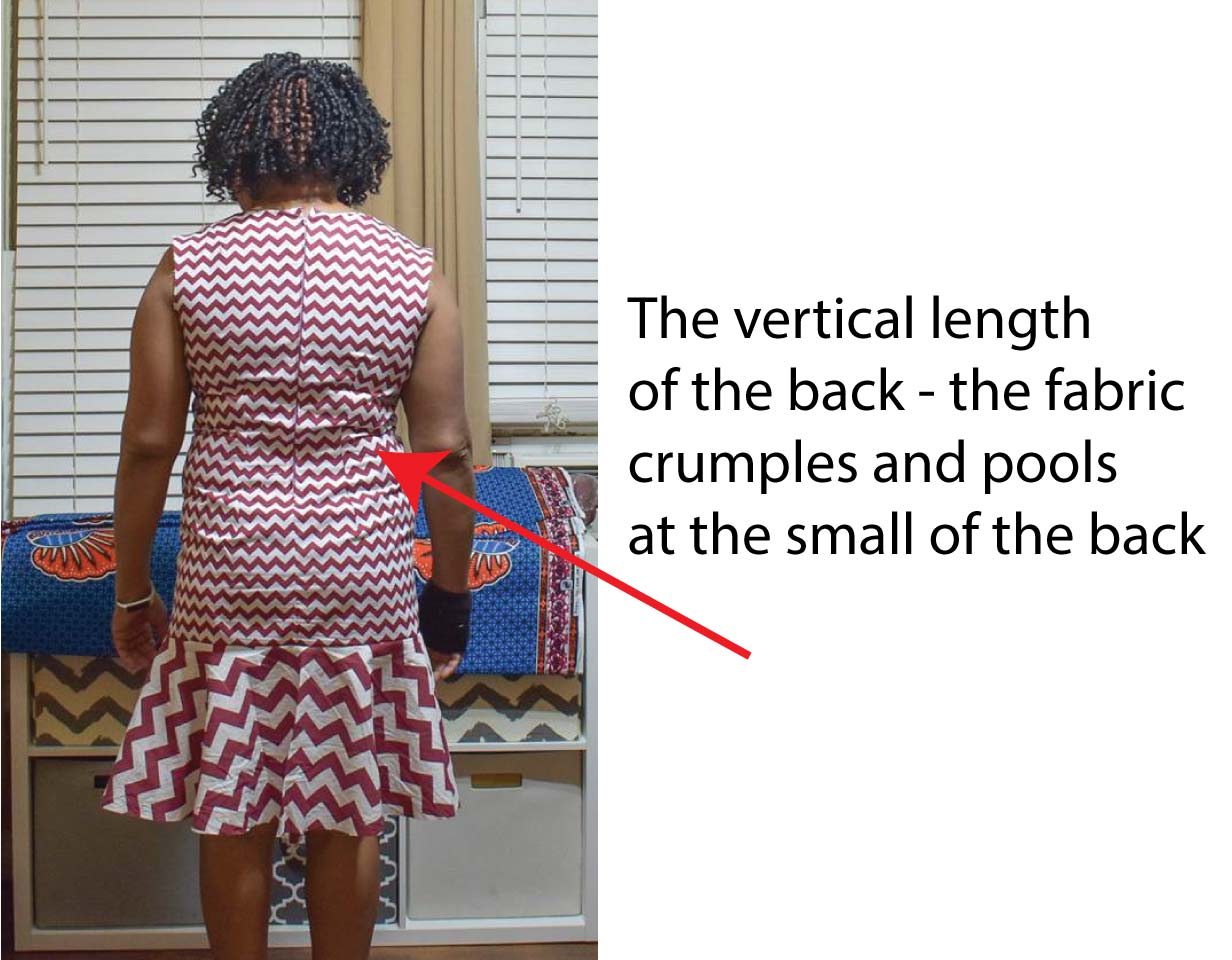
The above picture shows Barbara modelling her fitting toile – back view. You will be able to see a small amount of excess fabric in her vertical length. The fabric crumples or pools at just above the back waistline as the excess essentially has no where to go.
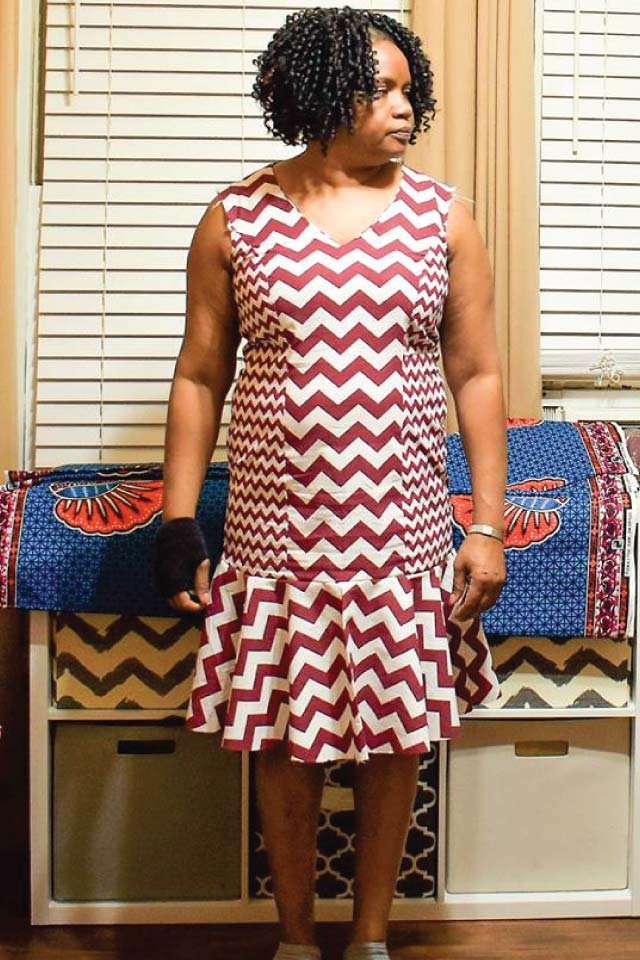
Barbara’s toile from the front shows a slight crumpling on the side seams.
The picture above shows a tiny bit of crumpling at her waist just at the side seams.
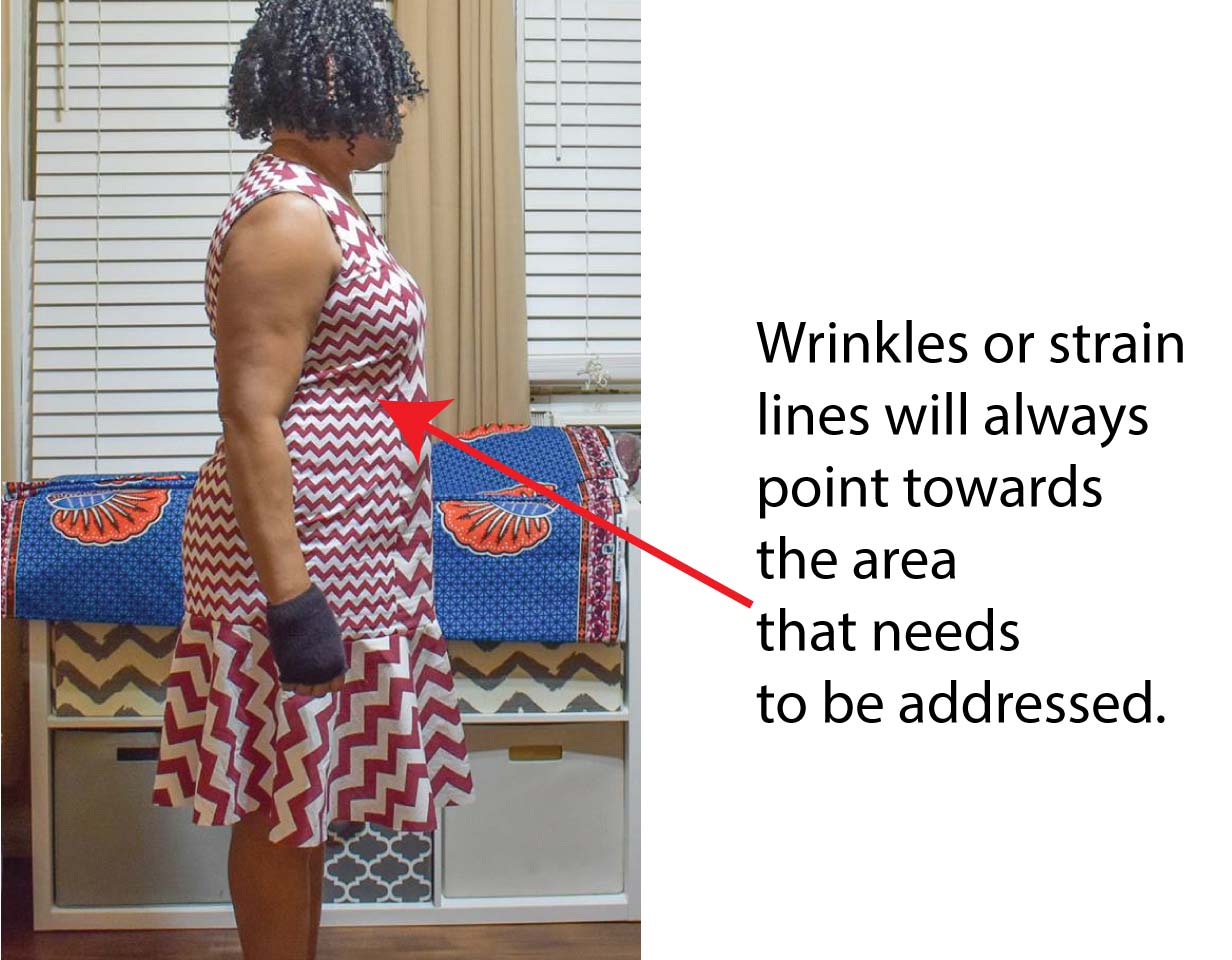
This side view picture of Barbara’s toile shows a line/excess fold of fabric pointing from just under the bust and travels right around to her CB.
The fold of excess fabric travels from the side front and increases in width as it travels to the CB.
And the above picture is a TELL-TALE sign of needed sway back adjustment.
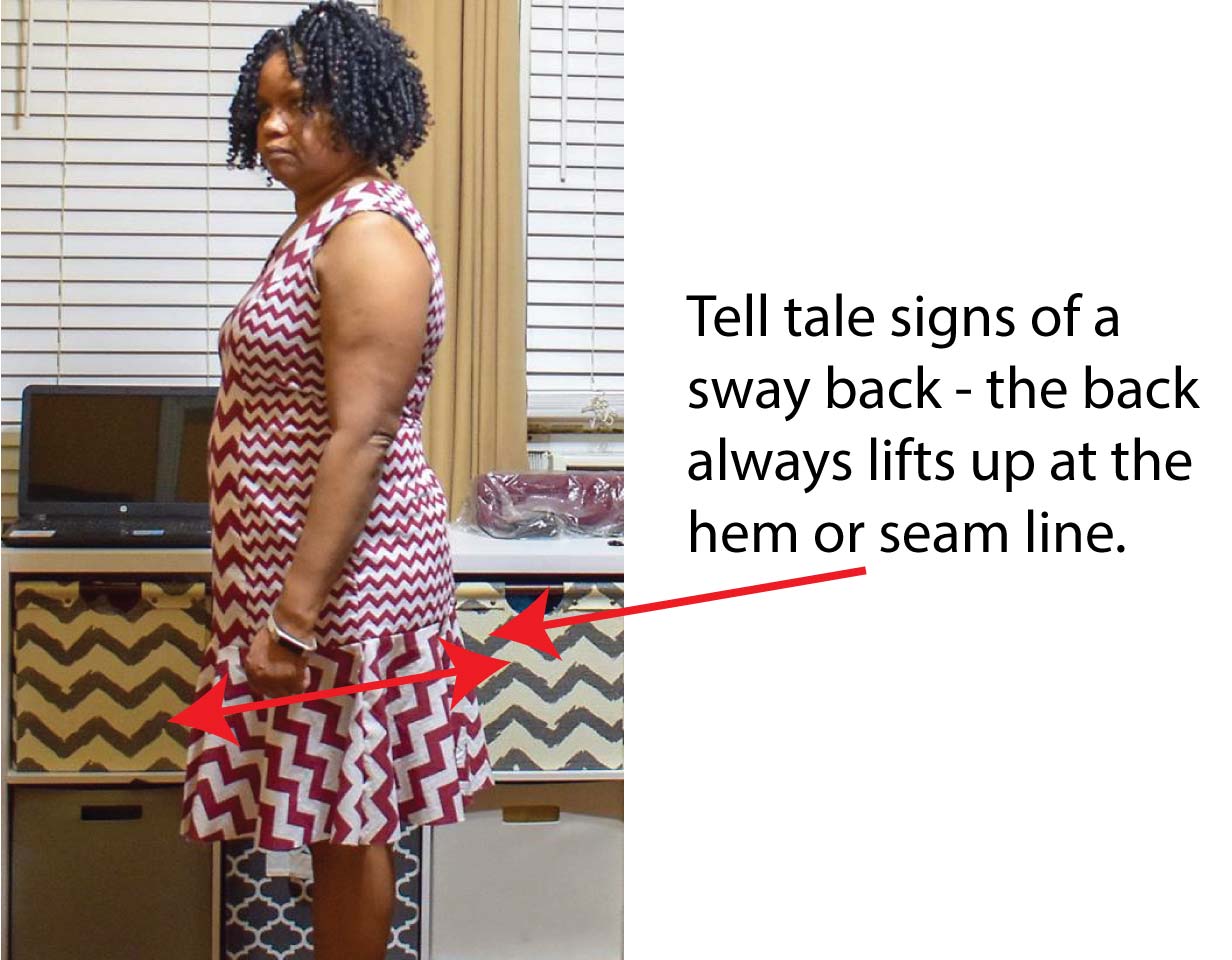
The seamline of the lower body where it connects to the flounce is tilted towards the CB.
The fabric that has folded on itself at the waistline area has now shortened the total vertical length of the body.
Stitching a Wedge into Back Dress Body.

To eliminate the excess back length a horizontal dart has to be sewn on the toile to ascertain how much the pattern needs to be altered. Whatever excess can be grabbed it then forms a dart across the body just above the waistline – from nothing at the side seam to the greatest amount at the CB.
Usually when making a toile zippers are all ready installed so unfortunately Barbara had to unpick her zipper for this adjust – but we wanted a good fit.
Once this wedge is sewn we can measure the total foldout for our pattern adjustment.
How To Adjust your Pattern for a Sway Back.

The back of the Clara dress is clearly marked where the waistline is.
Extend this line across towards the CB and the side seam.
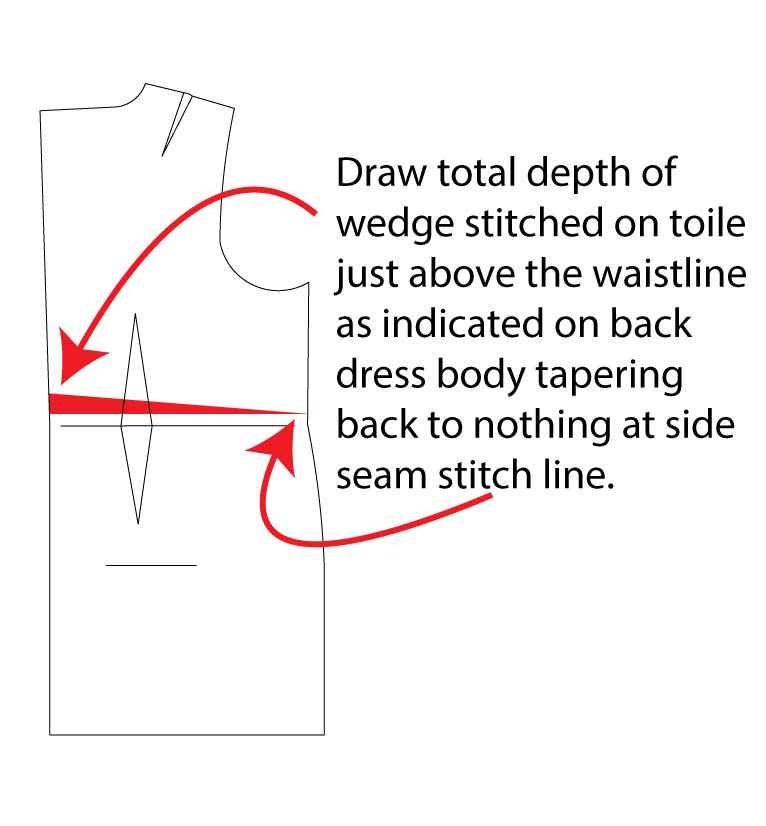
Just above the waistline – approx 2cms (3/4″) or so – draw a line parallel to your waistline.
Draw the total amount folded out/stitched on your toile – the greatest amount is at CB stitchline tapering to nothing at the side seam stitch line.
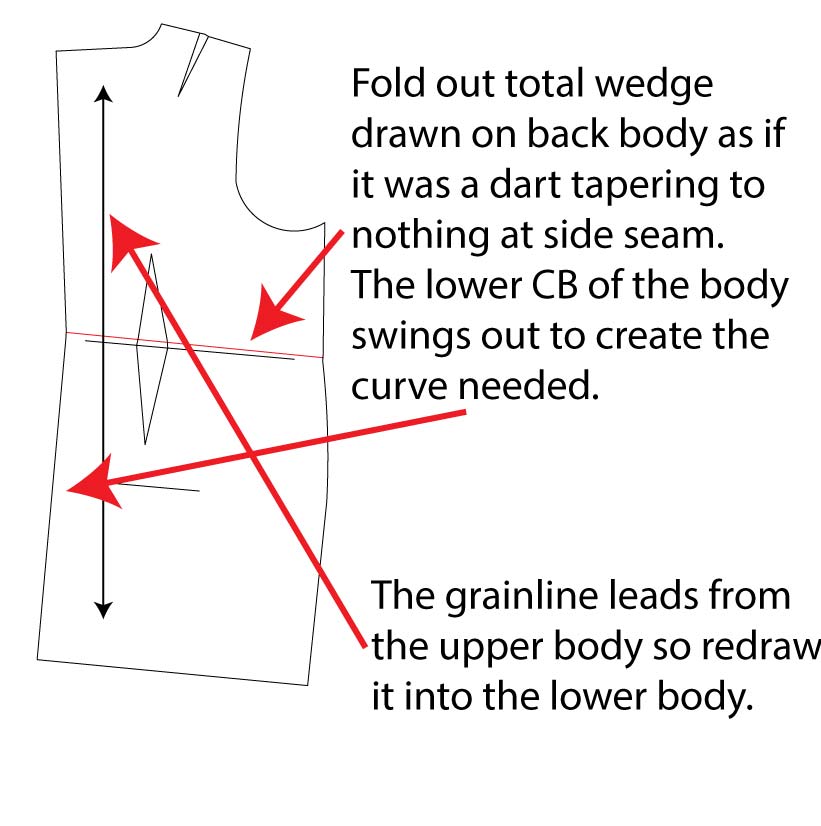
Now we have to eliminate this excess. Fold your pattern from edge to edge of the wedge – just like you would fold a dart to stitch it – and secure in place with adhesive tape.
The lower part of the body will kick out like the above picture but that is what we want – we are shaping the back pattern to create curve and shape to emulate Barbara’s body.
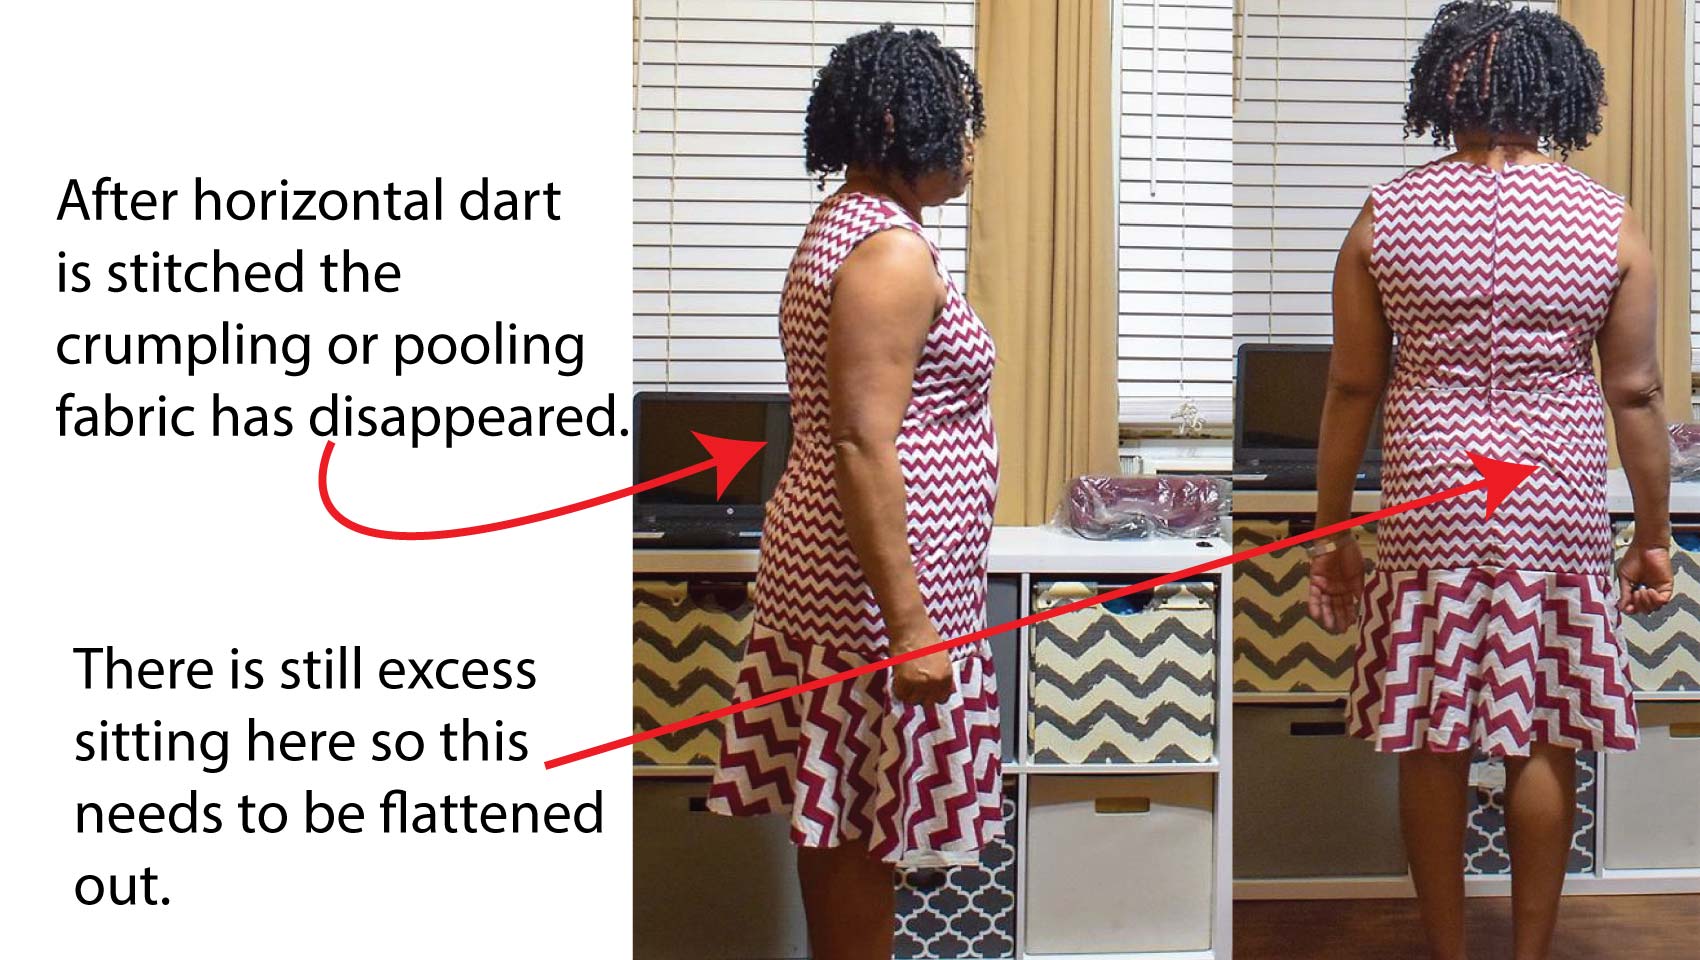
After Barbara’s horizontal wedge was stitched on her toile there was still a little crumpling on her back area across her buttock area.
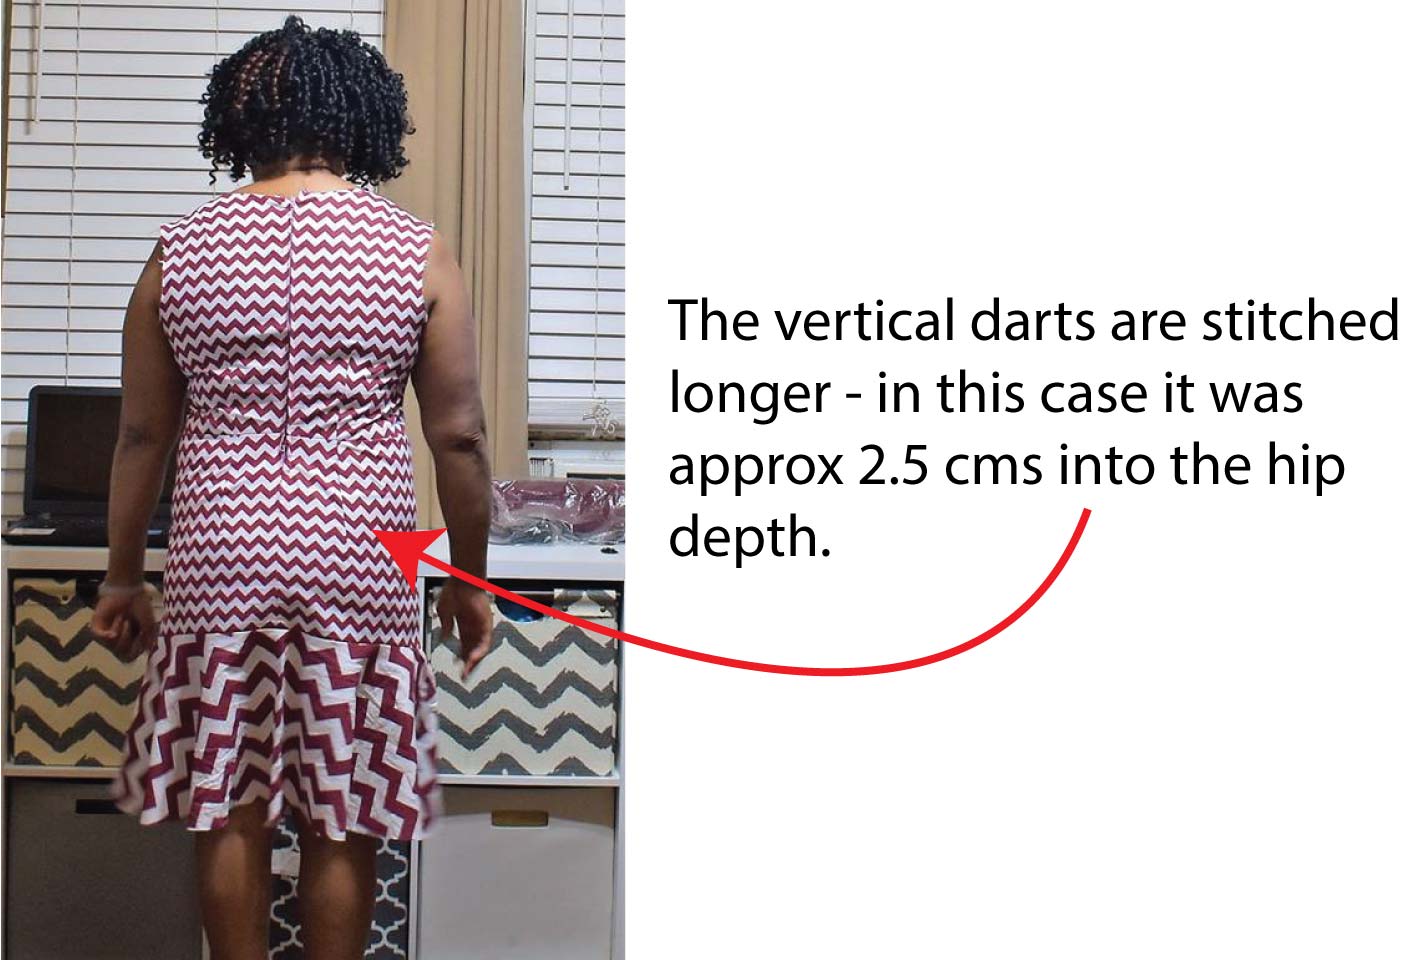
I asked Barbara to stitch her darts longer in their lower section by approx 2.5 cms (1″).
This amount will vary – it depends on what your toile is showing you want it wants to do.
Observe on your toile how much crumpling there is and pin fit before stitching.
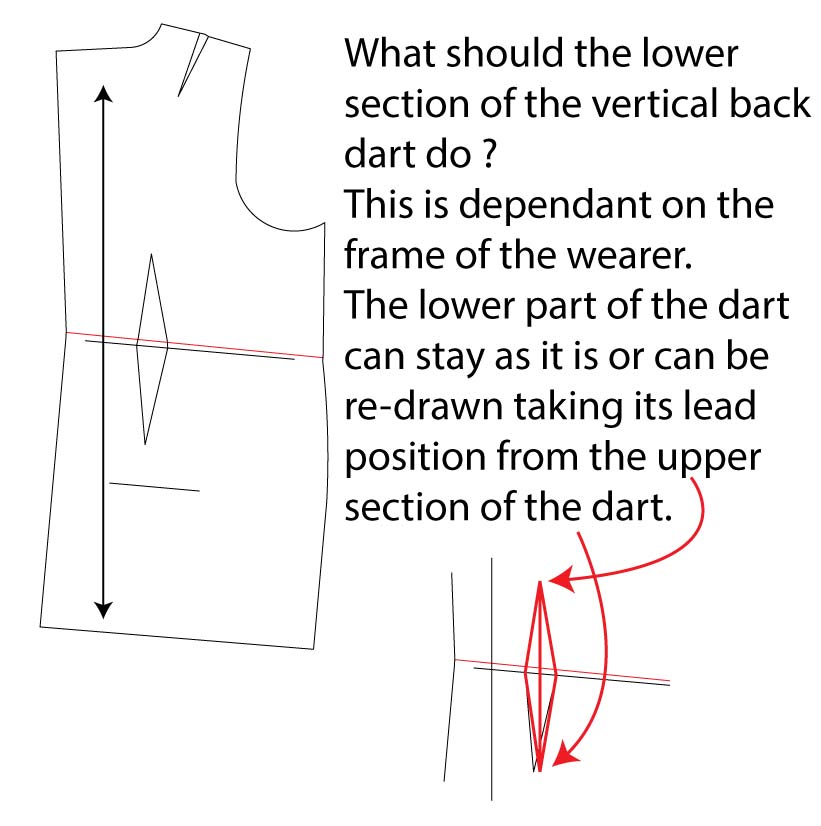
The above image details the back dart and what it should do after the wedge is folded out. Again it depends on what your toile is telling you.
You can leave the lower dart and stitch it at its slight angle – realign the dart to the upper section of its vertical – and/or lengthen the dart to whatever it needs.
But the grainline does takes its lead from the upper section of the body. The grainline is extended from its original position into the adjusted lower body.
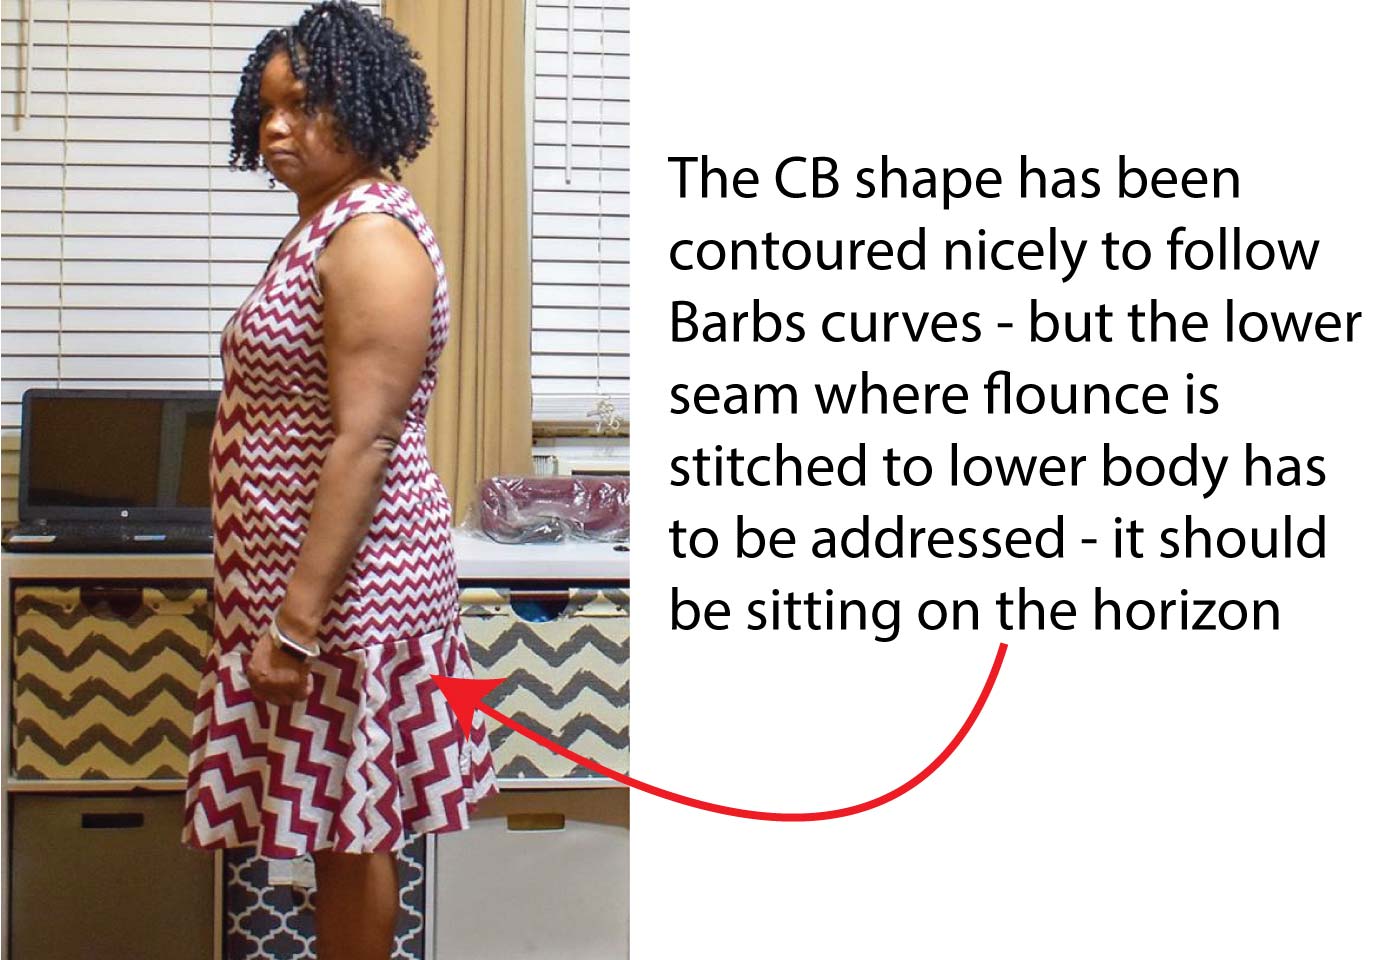
We have now contoured Barbara’s back seam in nicely and eliminated her excess fabric.
A sway back generally makes the lower hem or panel line kick up indicating loss of length as the above picture shows.
The amount folded out of the middle back area has to be added back to the lower body length.

Add the amount that was folded out at upper middle back to the lower edge of body at CB, tapering back to nothing at the side seam.
And this is how a sway back is determined and pattern is adjusted – it is quite an easy pattern alteration.
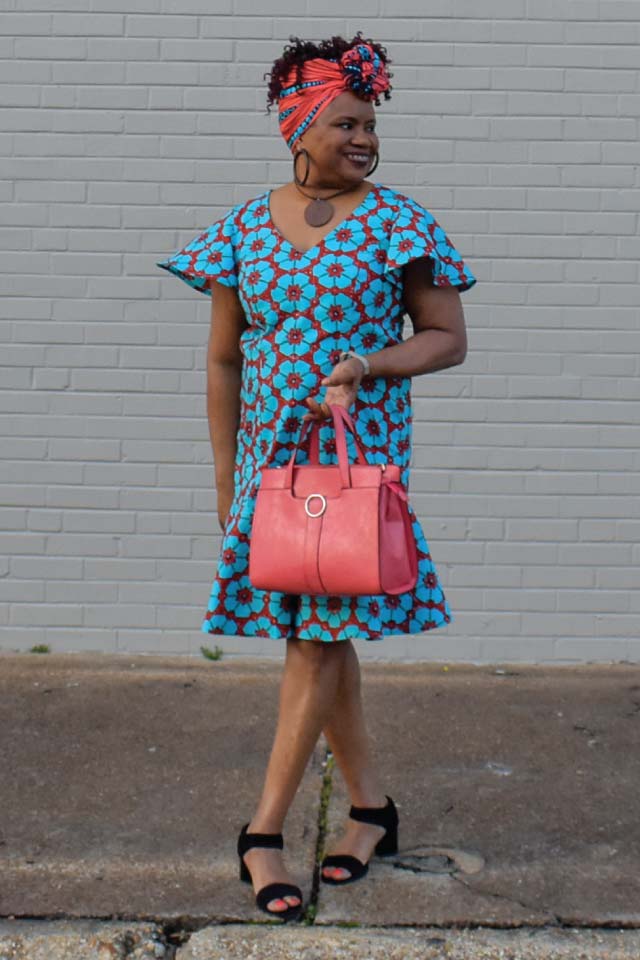
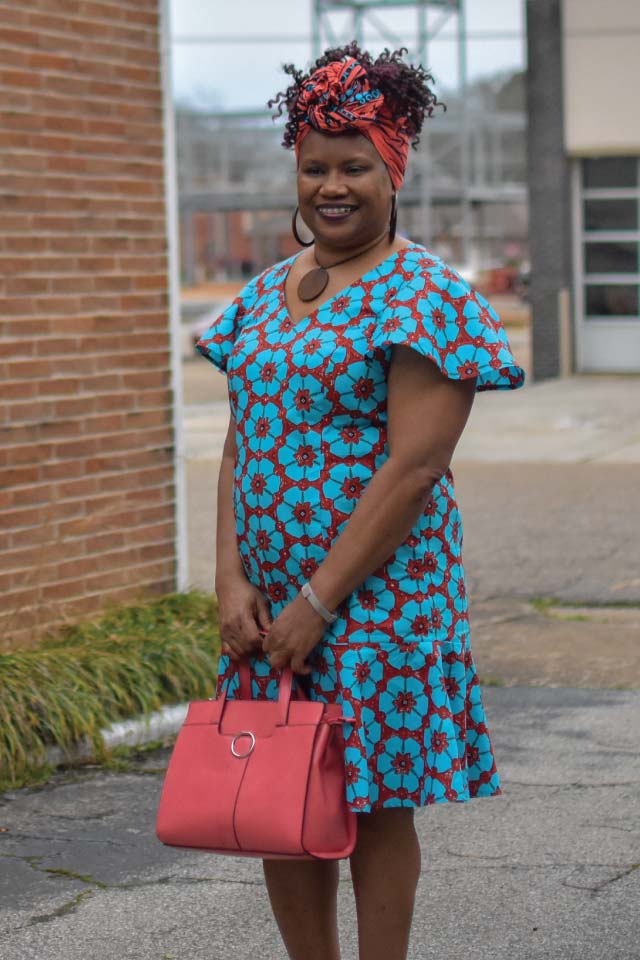
And I am sure you will all agree how absolutely GORGEOUS our Barbara B looks SUPER modelling her Clara Dress.
And tomorrow keep your eyes out for the next blog post –
Adjustment for a Gaping Neck.
Cheerio
Love to you all xx
Ann at Designer Stitch.
Oh – ps !!!….
The finer details : On Sale for a limited time only – $8.95 (US)
multi-sized pattern – including Cup Size B thru DD (E) :
(AU/UK) 6 – 26
(US) 2 – 22
(EU) 34 – 54
Intermediate Sewing Level.
https://designerstitch.com/shop/clara-dress